Podcast Microphone Setup: How to Set Up Your Mic and Recording Space

It’s no surprise that your podcasting microphone is one of the most important pieces of equipment you can buy for your show. But an expensive, high-quality microphone on its own doesn’t guarantee a clean, listenable recording. In fact, researchers at USC and the Australian National University found that listeners rate the very same information as less credible when it plays back in worse audio quality.
Microphone setup sits inside a bigger recording environment—room choice, treatment, and the rest of your chain matter too. If you haven’t nailed that foundation yet, read our podcast studio setup guide first; below, we focus on choosing a mic and getting it to sound right in your space.
How you use the microphone is also important. That includes where you record, how you position your equipment, and the other gear you use alongside it. In this article, we teach practical podcast microphone setup techniques so you get the best audio for your show.
Castos is a participant in the Amazon Services LLC Associates Program. We may earn commissions from your purchases on Amazon.com, though at no cost to you.
Step 1: Buy a High Quality Podcast Microphone
While it’s true that you can record a podcast with any microphone, even the built-in mic on your laptop or earbuds, that’s rarely the best choice. Your first step is to pick up a microphone that your audience deserves.
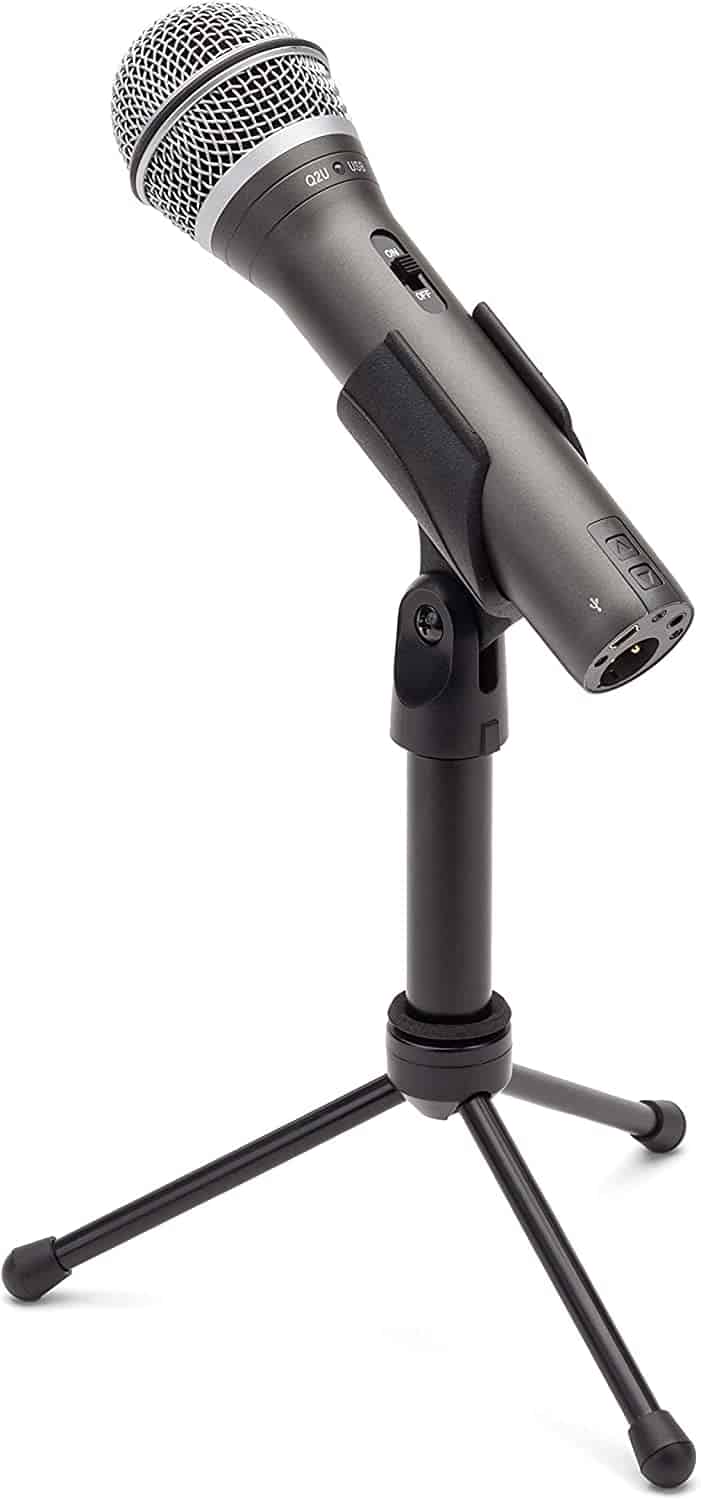
Our favorite option for a podcast microphone setup is the Samson Q2U. It’s dependable and affordable. Most importantly, it sounds great. Check out our full Samson Q2U review for more information.
If that mic doesn’t work for you, check out the Audio Technica ART2100x. It’s another popular and affordable option for beginner podcasters. If you’re willing to spend some money and want one of the most common podcasting mics, we strongly recommend the Shure SM7B.
When choosing a mic, you’ll have to make two decisions:
USB vs. XLR microphone
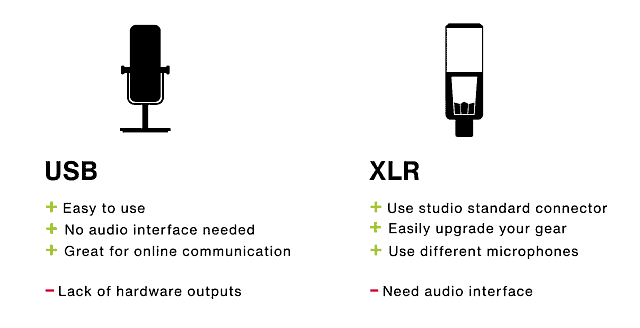
First, you’ll need to choose whether to buy a USB or XLR microphone.
- XLR mics use a connection with three pins (positive, negative, and ground terminals). They sound the best, but don’t connect to your computer. They sound the best, but only connect to audio interfaces or mixers.
- USB mics are super simple to use because they plug into any USB slot, but their audio quality is lower than an XLR mic.
Dynamic vs. condenser
- Dynamic mids are durable and great for loud sounds. They don’t require any external power, so they’re best for people who podcast on-the-go who record in unpredictable environments.
- Condenser mics are more sensitive. This means they’re audio quality is better, but they require a controlled environment. They also require an external power source, such as an interface or mixer with phantom power.
Step 2: Set Up in a Good Recording Space
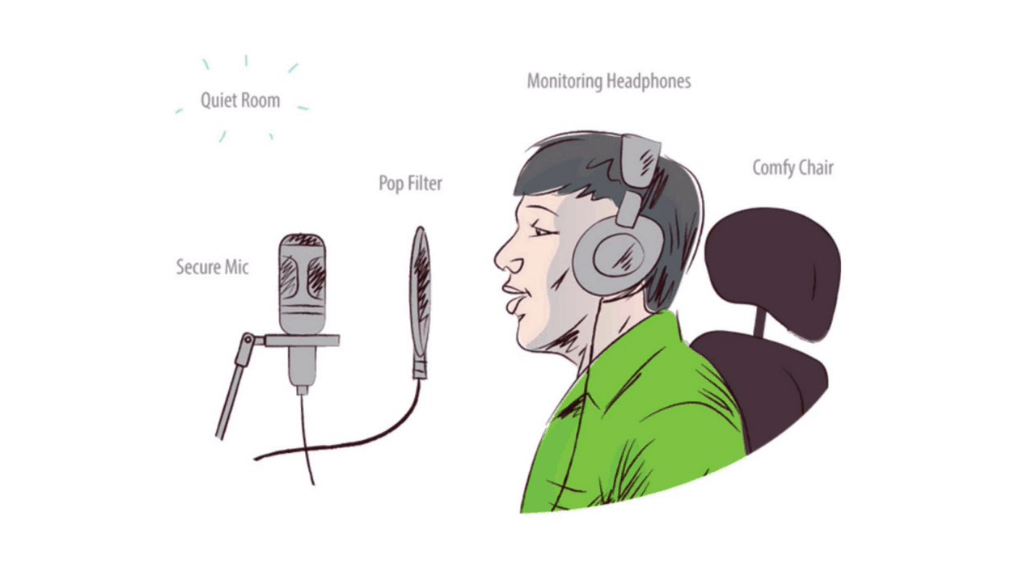
The next step for a good podcast microphone setup is to place your microphone in a recording space that is designed for good audio. The type of room you record in can affect what the microphone picks up.
It’s important to record in a place without any background noise. That means no traffic outside your window, barking dogs, children playing, or even a neighbor coughing. Your mic will pick up these sounds and you’ll struggle to remove them during editing.
To avoid this noise, find a space in your office or home that’s far away from sounds. Choose a room with a lot of soft surfaces, like upholstered sofas and chairs, curtains, and pillows. These will absorb outside sound so it never makes it to your recording. They will also absorb inside sound so your voice doesn’t echo back to the mic.
Furthermore, consider the size of the room. A large room makes your voice sound bigger than it is. Opt for a small space where your voice doesn’t carry. Draping a blanket nearby is a great way to make a recording space smaller.
Step 3: Position Your Mic Properly
The ideal microphone placement for a podcast recording can vary depending on several factors, including the type of microphone you’re using, the acoustics of your recording space, and your personal preferences.
However, here’s a general guide for placing a typical cardioid or dynamic microphone:
Microphone Position
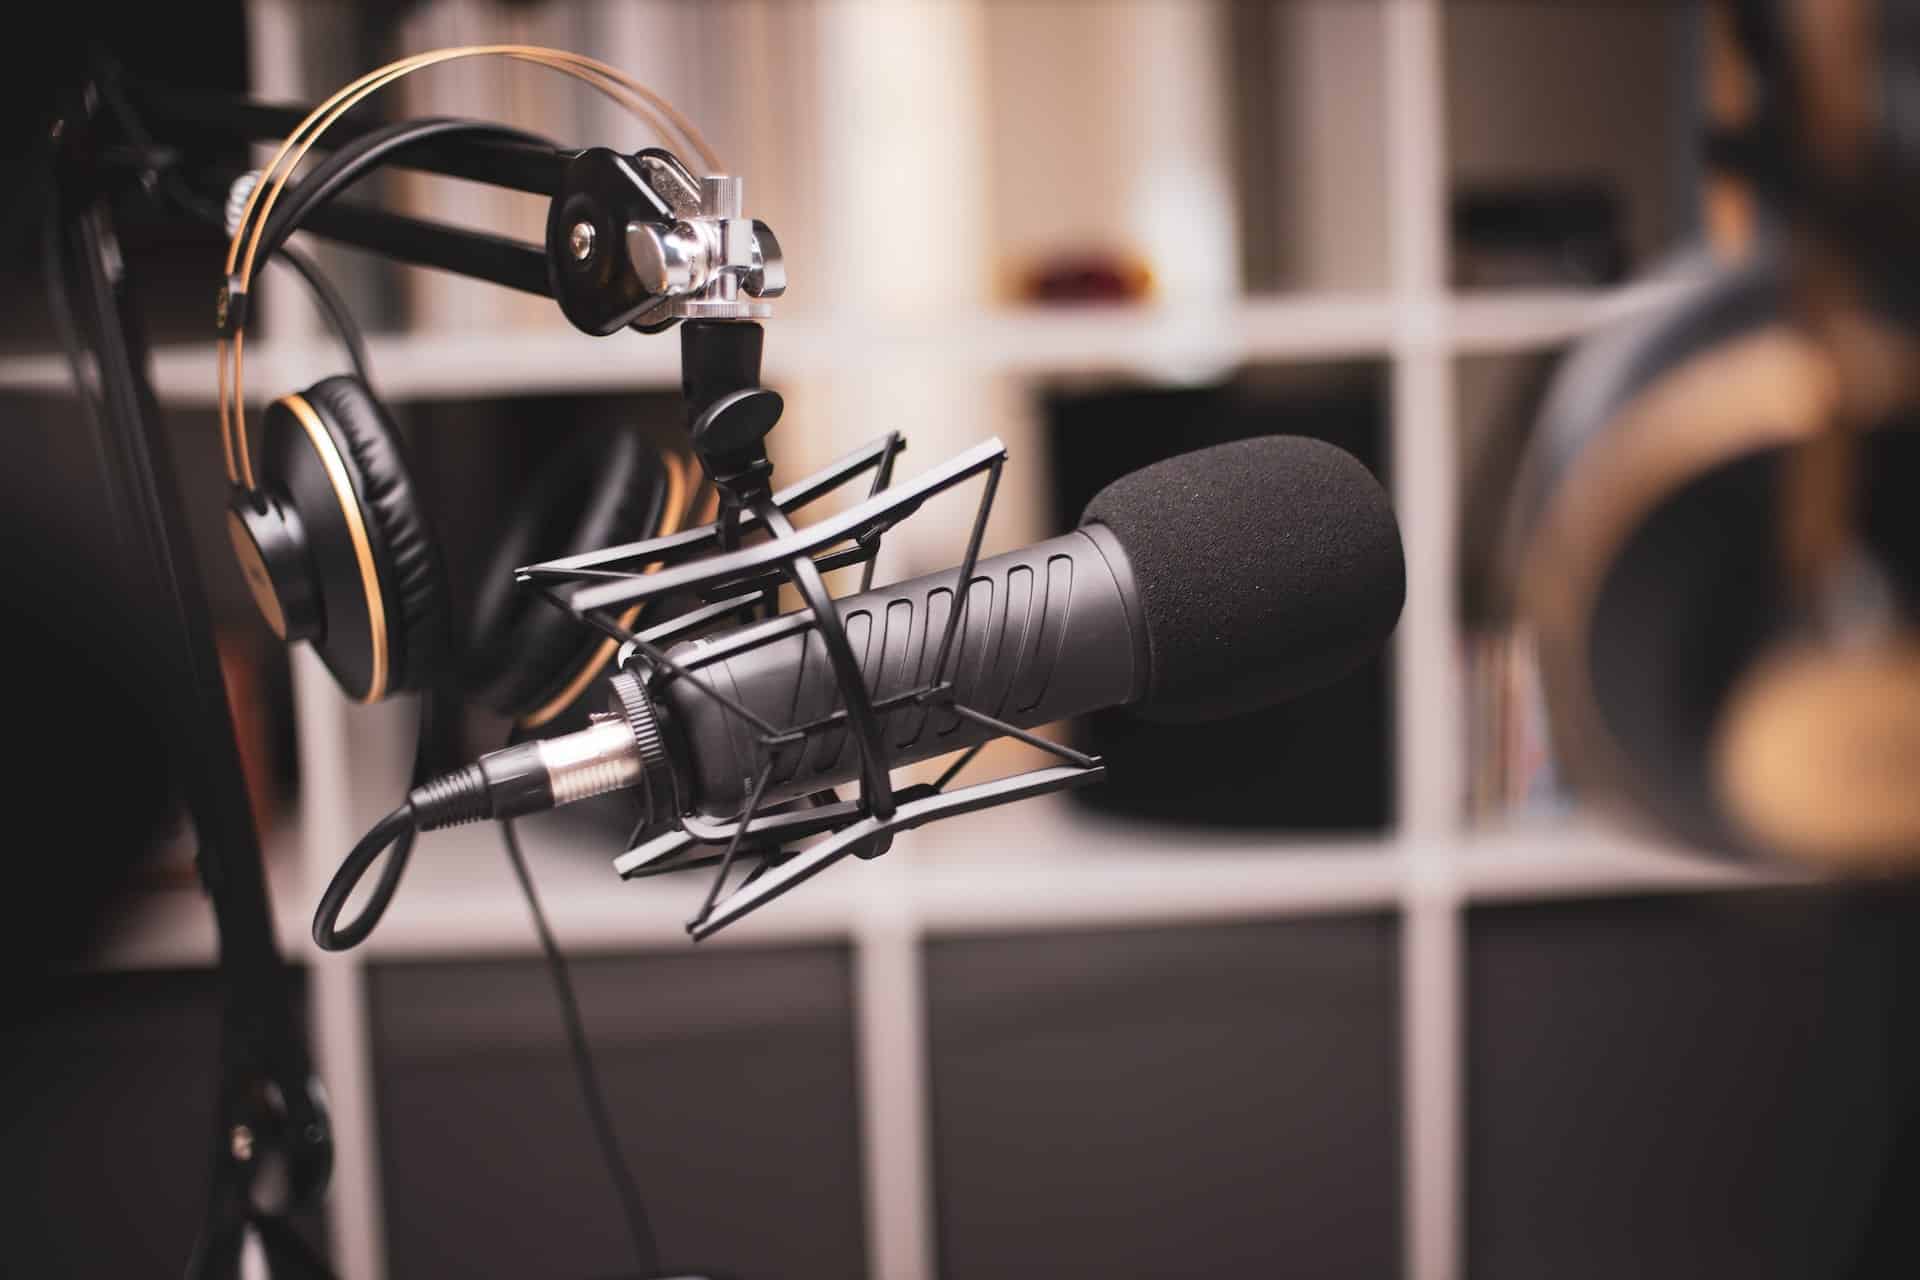
- Place the microphone on a stable stand or mount it on a boom arm. Avoid handheld operation to prevent noise from handling it. Boom arms are great because they keep the mic away from your keyboard and desk noises.
- Position the microphone approximately 6 to 12 inches (15 to 30 centimeters) away from your mouth. This distance helps capture your voice clearly while reducing plosive sounds and breath noise. You may have to experiment to find the perfect distance, but once you find it, don’t move anything.
- Angle the microphone slightly upward toward your mouth at about a 45-degree angle. This helps prevent plosives (e.g., “p” and “b” sounds) from hitting the microphone directly.
- Make sure nothing will obstruct the microphone during your recording, such as your clothing or other equipment on your podcasting table.
Microphone Directionality
If you’re using a cardioid microphone (which is common for podcasting), speak directly into the front of the microphone. Cardioid microphones are most sensitive to sound coming from the front and reject sound from the sides and rear.
If you have an omnidirectional microphone, it captures sound equally from all directions, so you don’t need to worry about speaking directly into it.
Step 4: Wear Headphones Whenever You Use a Mic
Using headphones when working with a microphone is vital for podcasting. Firstly, headphones enable real-time audio monitoring, ensuring that the recorded sound is clear, free of distortion, and devoid of unwanted background noise.
Headphones provide instant feedback and allow for immediate adjustments if any issues arise during recording. By hearing your own voice while recording, you can control volume, tone, and pronunciation for improved vocal performance and clarity. They also help identify and manage problematic sounds like plosives and sibilance.
Additionally, headphones help prevent feedback, a common problem when microphones and speakers are used together. By wearing headphones, you can avoid the microphone picking up and amplifying the sound from the speakers, preventing unpleasant squealing or howling noises.
When it comes to buying headphones, you have a lot of options. It mostly comes down to cost and comfort. Check out our guide on the best podcast headphones.
Step 5: Install a Pop Filter on Your Mic
Sound is just air molecules moving back and forth that microphones detect. Some sounds we make produce an especially powerful burst of air that end up sounding louder than they should in the recording.
These sounds are called plosives. Plosives occur when we purse our lips and release sudden bouts of air, like we use “K,” “T,” “P,” “G,” “D,” and “B” sounds. Plosives are irritating and distracting, especially over long periods of time.
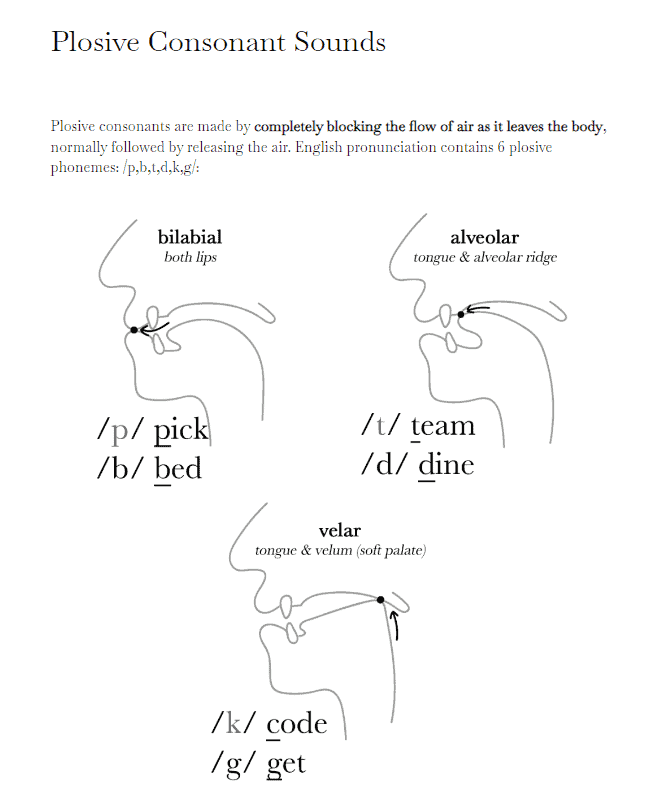
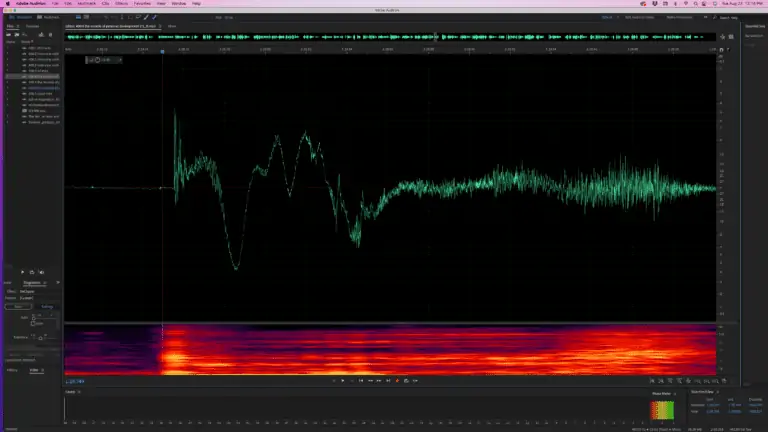
Here’s what a plosive looks like in an audio editing tool like Adobe Audition. That big spike is a plosive. It’s substantially louder than other parts of the recording.
You can minimize your plosives with the help of a pop filter. Pop filters are mesh screens that attach to your microphone. They create a barrier between your mic and your mouth to dampen bursts of air, thereby maintaining an even sound.
Pop filters are cheap, easy to install, and produce a remarkable effect on your audio quality. If you’re serious about your sound, you should definitely have one.
Our favorite pop filter is the Nady MPF Clamp On Pop Filter. It comes with a flexible gooseneck and metal stabilizing arm. You can see more options in our guide on the best pop filters.
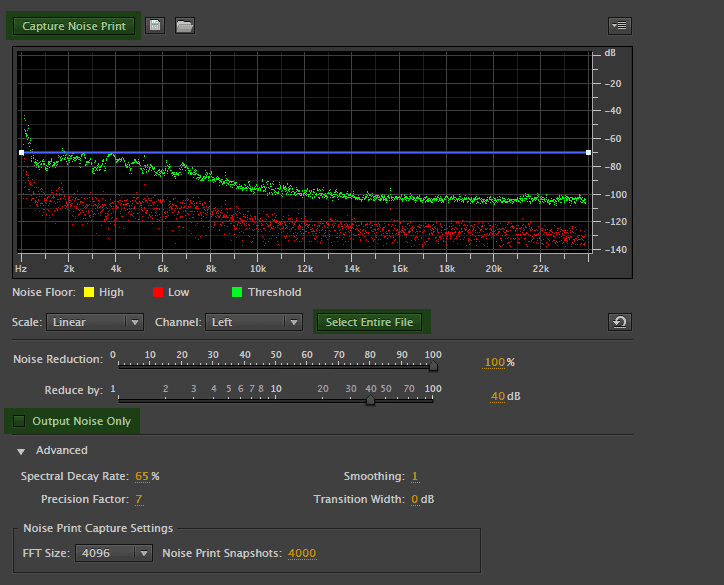
Step 6: Use a Noise Canceling Software
If your recording space has some unavoidable background noise, you may find it helpful to use recording/editing software with noise reduction features.
Noise canceling is when your software identifies the noises in your audio that aren’t your voice and slices it out of the recording. Typically, these tools give you some control over what counts as noise in the file.
That said, noise canceling isn’t perfect. Some things will slip through the cracks and the software may associate your voice with noise in some cases. So the best solution is to always record in a quiet place that absorbs echoes.
Step 7: Adjust Your Mic’s Settings as Necessary
Microphones and audio recording software typically have tons of settings and options that you can play with in order to optimize the captured audio in your environment. If you’re using an audio mixer or interface, this device will have settings as well.
Volume level
If your volume is too high, you may get distortion or clipping. If your volume is too low, voices will sound muffled and incomprehensible. Play with these three parameter:
- Keep your peak level under -6dB.
- Keep your loudness meter in the “green” or “safe” range.
- Keep your average level between -12dB and -15dB.
- Play with the Equalization (EQ) until you find a setting that works for you.
Recording parameters
- Use WAV or AIFF file formats for podcasts.
- Use 16-bit or 24-bit for bit depth.
- Choose mono or stereo recording depending on your needs.
- Use a bit rate of 128kbps.
- Use a sample rate of 44.1 kHz or 48 kHz.
Gain / input level
Speak into your mic as you intend to during a recording. Adjust the gain until you see peaks on your meter in the -10dB range. This should prevent clipping. An easy way to find this spot is to turn up the gain until you hear buzzing in your headphones, then turn it down slightly.
Step 8: Run an Experiment Before Recording an Episode
Before you sit down to record that first episode, it’s important to conduct a test recording in order to fine-tune your microphone settings and placement. Simply record a few minutes of yourself speaking, then play it back, listen for any audio issues, and make any necessary adjustments.
Every voice and recording environment is unique, so experimentation is key to finding the ideal placement. You should conduct a test recording any time you record in a new environment or bring a new guest on to your show.
Remember that while these guidelines provide a good starting point, personal preferences and the specific characteristics of your voice may require slight adjustments. Regularly testing and refining your microphone placement can help you achieve the best possible audio quality for your podcast recordings.
Ready to start recording? Our guide on recording your first episode is a key tool to help you create a great episode on your first try.
Your Podcast Microphone Setup
Everyone’s podcast microphone setup is a little different period. You may prefer to use an audio interface, whereas other podcasters prefer to plug right into their computer. You may prefer to record standing in your closet, while some podcasters like to sit at a specialty podcasting desk.
What’s important is that you find the podcast microphone setup that works best for your workflow.. You don’t have to use the same equipment as everyone else. Use the tools that help you produce the best content.
What’s in your podcast microphone setup? Let us know in the comments!
Launch Your Podcast In Minutes
Castos makes launching simple with one-click setup, automatic distribution to all platforms, and professional hosting. No technical skills required.
Start your 14-day free trial