Acoustic Treatment for Podcasting: 7 Tips to Eliminate Reverb

One of the classic signs of a poorly produced podcast is reverb: the painful sound of a mic picking up the same soundwaves over and over. If your audio is full of reverb, your listeners will dismiss you as an amateur performer with an incomprehensible show.
Reverb can be useful as an effect, like when you want to sound silly or dramatic, but it’s difficult to hear for long periods of time. If you’re struggling to get rid of the reverb in your audio, you’ll need some acoustic treatment techniques to get your audio sorted.
Fortunately, reverb is avoidable if you take the right steps, and fixing it is one of the biggest wins in recording a podcast that sounds professional. In this post, we’ll explain how reverb works and what you can do to prevent it.
What is Reverberation?
Reverberation (or “reverb”) is the reflection of sound off surfaces. We also call it an echo. It’s clearest in wide open spaces with lots of hard surfaces for sound to bounce. You’ve probably played with echoes in stairwells or auditoriums.
Reverb is important because it helps us understand our environment. The intensity of reverb gives us clues about the size and type of spaces we’re in. Fast and sharp reverb that dies immediately tells you you’re in a small space. Slow and weak reverb that reflects for a while tells you you’re in an open space.
Most echoes, however, are quite complex due to a variety of surfaces that produce different kinds of reflections. In many cases, the waves come so quick that they’re indistinguishable.
Reverb in Your Podcast Recording Room
If you’re like most podcasters, you record in a small-ish room with lots of hard surfaces. Sound waves travel from your mouth to the microphone. But sound waves also travel from your mouth to other surfaces in the room, reflect off those surfaces, and reach the microphone again.

This creates reverb in the recording – multiple pronounced reflections of the same sound. Since the reflections appear almost simultaneously with your voice, they are difficult to remove the reverb during editing.
The best solution, therefore, is to prevent reverb from happening in the first place. Truthfully, this advice applies to anything that needs to be edited out later – background noises, long periods of silence, interruptions, etc. It’s always easier to prevent them than fix them.
So how do you prevent reverb? By eliminating reflection points.
A reflection point is a surface near your recording spot that will reflect your voice back to you. The floor, ceiling, and walls are obvious reflection points. But so is your desk, that mirror in the corner, and that countertop.
But before you can start eliminating reflection points, you’ll need to understand three acoustic treatment principles.
Acoustic Treatment Principles
When it comes to using acoustic treatment in your podcast studio, it’s important to understand three principles: absorption, diffusion, and sound-proofing.
Acoustic Treatment Principle #1: Absorption
Absorption is the most common approach to acoustic treatment because of its effectiveness. This is the practice of placing an absorptive material between the source of sound and a reflective surface. Sound must travel through the absorptive material before it can reflect, but by that point all the energy has been discharged. When the sound reaches the absorptive material, it simply “dies.”
Acoustic Treatment Principle #2: Diffusion
Diffusion is the practice of placing a variety of surfaces near the source of sound, each with different depths and angles. These surfaces produce lots of reflections at different speeds and angles that ultimately break up and scatter what would be a distinct reflection. It’s like sending the sound away rather than it coming straight back to the mic.
How effective are absorption and diffusion? Think about the last time you moved into a house or apartment. When the space was empty, you could probably hear a distinct echo. But as soon as you began adding furniture, rugs, and other possessions, the echo disappeared. This is because all of those items absorbed or diffused the echo.
What’s important to understand here is that you don’t need to spend thousands of dollars to build a podcast recording studio in your home. You can take a big step toward implementing acoustic treatment principles by choosing the right room or adding soft furniture.
Acoustic Treatment Principle #3: Soundproofing
Soundproofing is an acoustic treatment technique to keep outside sounds out of the recording room and inside sounds in the recording room. Properly soundproof rooms require structural additions to create real isolation from the outside.
Unless you have the budget to open your walls and insert soundproofing materials, this is probably out of your reach. Besides, this level of noise reduction is usually an overkill for podcasters.
Why are we mentioning soundproofing if it’s not important for the average podcast? Because the term soundproofing is often used as a catch-all for acoustic treatment techniques, but it’s important to understand that it refers to something different.
How to Use Acoustic Treatment in Your Podcast Studio
Now that you understand how acoustic treatment works, let’s go over some steps you can follow to improve the sound in your recording space. These tips will help anyone who podcasts in an environment they can’t control completely.
1. Fill the room with stuff
This sounds a little silly, but it’s a legitimate acoustic treatment technique. More items in a room creates more opportunities for opportunities for sound to be absorbed instead of reflected. Opt for soft materials like furniture, curtains, and rugs, ideally with curved surfaces that don’t send sound right back at you.
This acoustic treatment technique is great for interview podcasts where guests arrive on site and want to sit in a comfortable environment. It’s also good for solo podcasters who don’t mind sitting in a cluttered room.
2. Lay out some blankets
Blankets are excellent sound absorption tools because they can be positioned anyway you like over reflection points. You can drape them over chairs, hang them on the wall, or lay them across your desk and floor. Choose heavy blankets and lay them across the nearest reflection points to disrupt the most sound.
You can also hang and remove blankets as needed, which helps you have to record in your normal living space. Some podcasters simply cover themselves with a big blanket while they record. It’s hot, but effective!
3. Install acoustic paneling
If you consistently record in the same environment, add acoustic paneling to the walls and/or ceiling. You have lots of choices, but purchase the thickest ones you can afford. Install them in the path of sound so they absorb as much energy as possible.
If you don’t have the budget for acoustic panels, consider making your own. AcousticsFreq has a great tutorial on DIY acoustic panels.
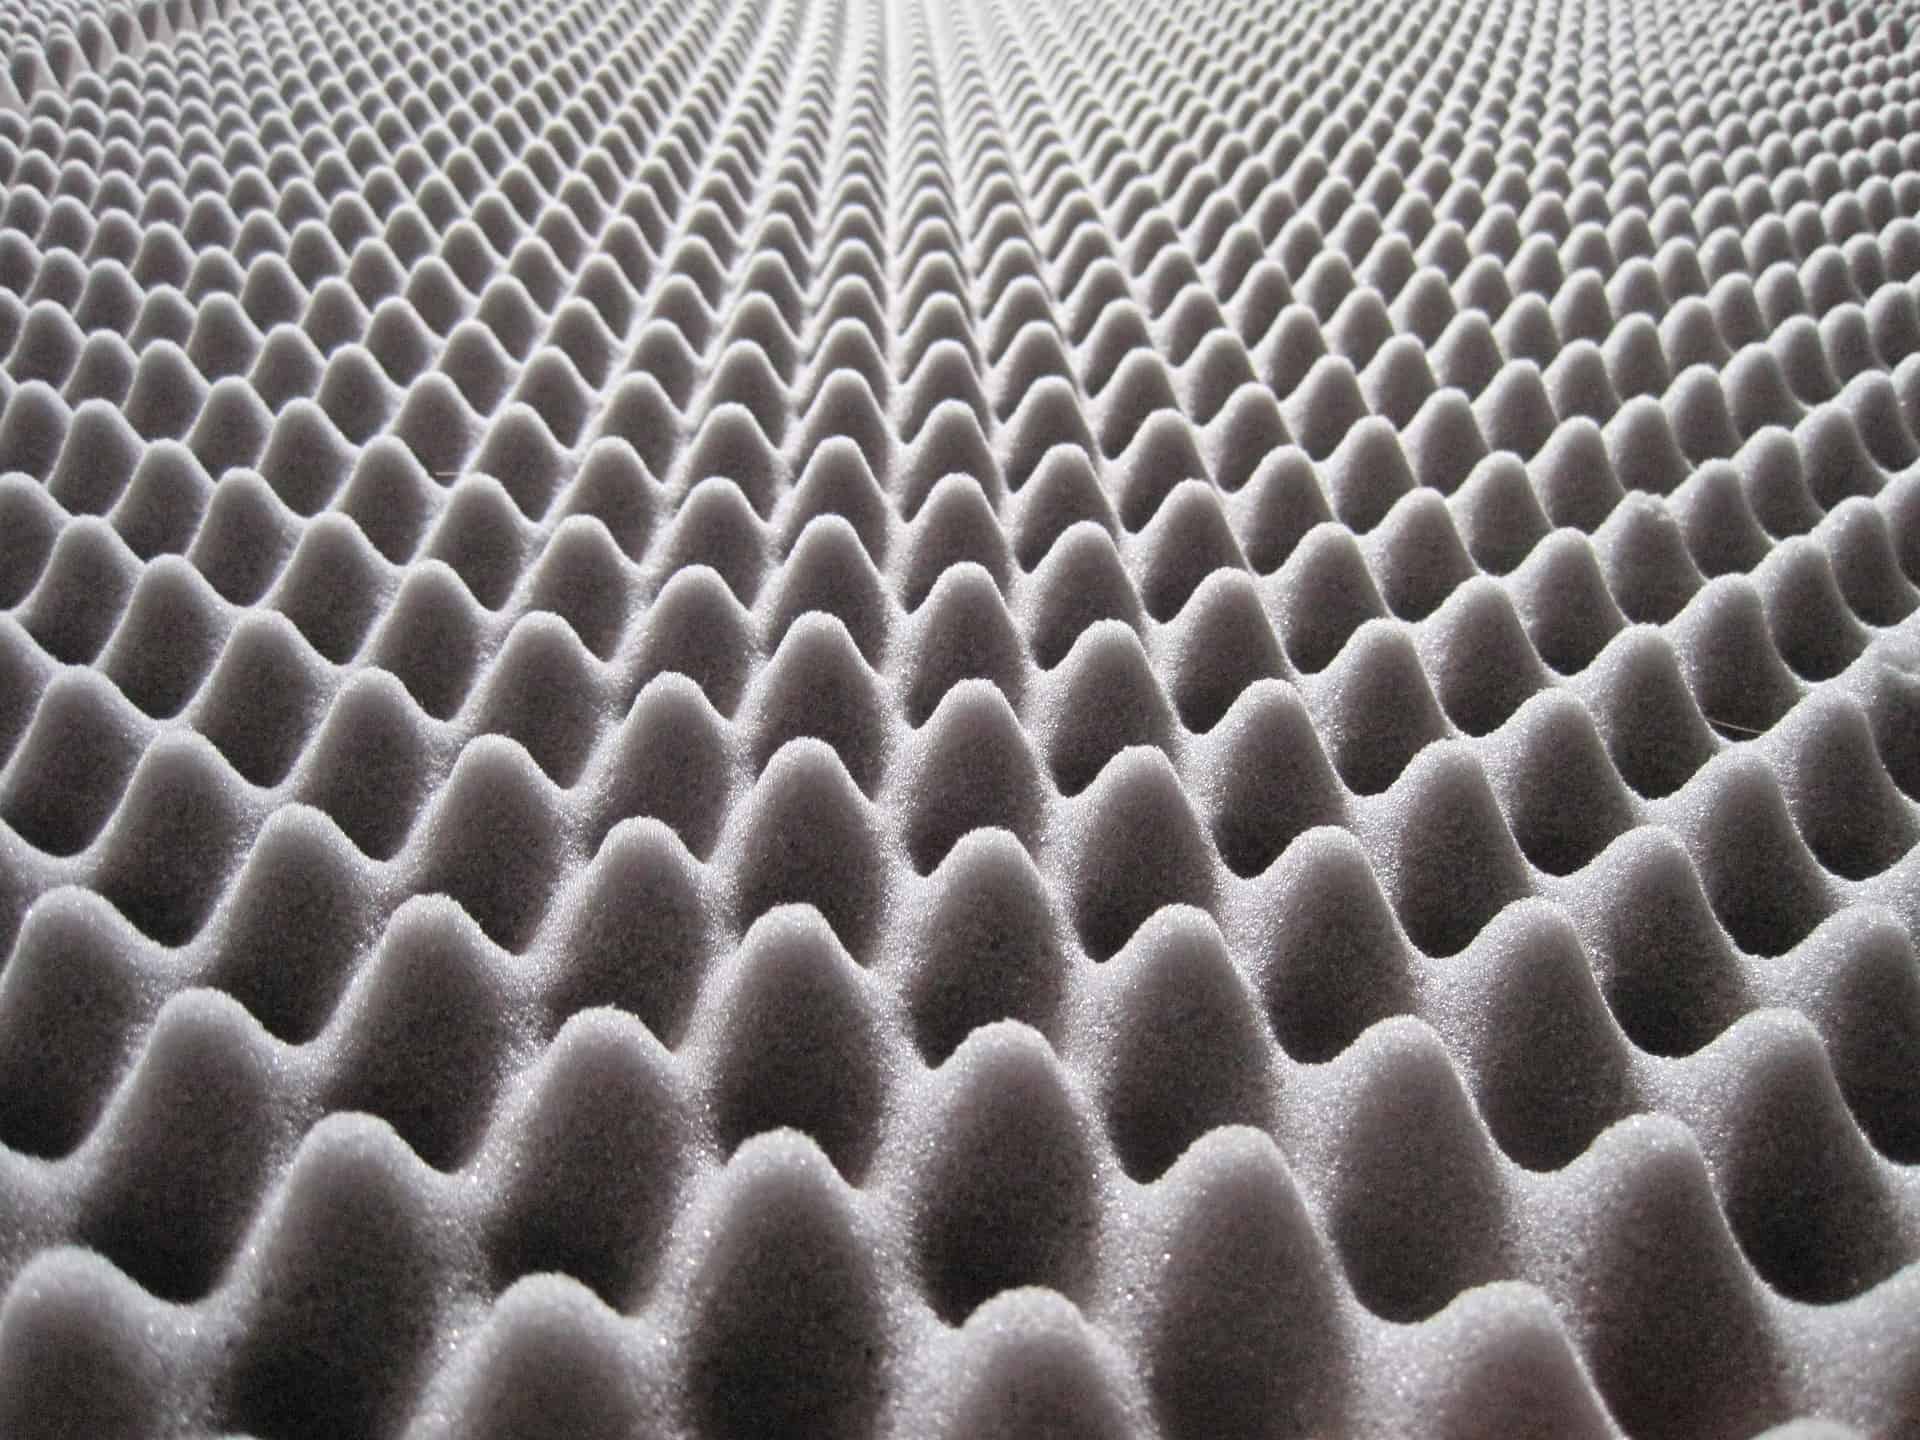
Alternatively, you can use Auralex foam to absorb sound. These aren’t as effective as proper sound panels, but they’re inexpensive and just as easy to hang.

4. Pick up a reflection shield
A reflection shield (also called a “gobo” which is short for “go between”) is a sound absorption device that mounts to your microphone. It surrounds the mic on three sides with sound absorption material. They’re great for environments that just need a little bit of absorption to stop reverberation.
Want to make your own reflection shield? This video tutorial is super helpful. It will show you how to make your own shield for less than $10.
5. Identify the best absorption points
Not sure where to place your acoustic panels or foam? These two strategies will help you identify the best locations.
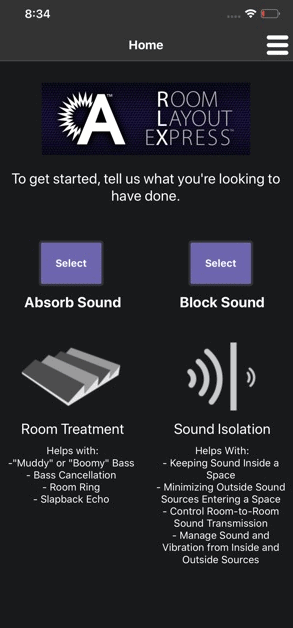
First, grab the Room Layout eXpress app from Auralex. It’s an automated acoustic treatment mobile app that will give you instantaneous recommendations for placing absorption/diffusion gear in various room types. It works with rooms up to approximately 8,000 cu. feet depending on the room size.
Second, perform the mirror test. Sit where you typically sit to record an episode. Have a friend slide a mirror across the walls at your level. Install acoustic treatment panels at all the spots where they see you in the mirror.
6. Opt for a dynamic microphone
While there’s no doubt condenser mics pick up crystal clear sound, it also means they pick up everything. Dynamic microphones are more directional and less sensitive to the environment than condenser mics.
Need mic technique tips? Check out our full guide: Top 11 Podcast Mic Techniques for New Hosts
7. Record in your closet
We hear from a lot of podcasters who say the best acoustic treatment is to record in their closet. This is quite common, but it’s not always the perfect solution.
Small spaces can create prominent reflections because the reflection points (the walls) are so close to the sound source. This creates an unpleasant quality where the echoes happen so fast that they seem like part of your voice. This also means they’re impossible to edit out.
So why do people like closets? Because closets often have items that create lots of absorption, like carpeting, cardboard boxes, and – most effectively – clothing.
If you hang clothes in the closet, hang a blanket on the inside of the door and you’ve got a high-absorption room for recording. If your closet is empty, however, or only contains items with hard flat surfaces, you’ll have to do a lot of work putting absorption materials or use a different room.
Acoustic Treatment for a Better Show
You don’t need much to start a podcast. Anyone can do it with a few simple tools and a bit of effort. But that doesn’t mean you can skimp on quality. If you produce episodes with unpleasant audio, you will struggle to attract listeners and grow your show.
Whether you decide to spend a little cash or take the DIY approach, follow the acoustic treatment steps we outlined above to eliminate as much reverberation as possible. Your listeners will thank you for it!
Not sure how noisy your room actually is? Our free microphone test measures your noise floor in your browser and tells you how it compares to the -60 dB professional spec, before and after you treat the space.
Launch Your Podcast In Minutes
Castos makes launching simple with one-click setup, automatic distribution to all platforms, and professional hosting. No technical skills required.
Start your 14-day free trial