These days, we have a lot of tools to help us create incredible content. It’s possible to produce quality podcast content with just an iPad podcast setup (or other Apple device).
Yes, a proper podcast setup will produce the best audio. But in some cases, the benefits of using simple and portable tools outweighs the need for crystal clear audio. Sometimes “good enough” is what you need, especially if you’re just starting a podcast and don’t have the budget for lots of equipment.
Castos is a participant in the Amazon Services LLC Associates Program. We may earn commissions from your purchases on Amazon.com, though at no cost to you.
Why Record a podcast on an iPad?
Recording on an iPad can be an attractive choice for content creators:
- Portability: iPads are lightweight and portable, allowing you to record episodes from virtually anywhere. This mobility is especially beneficial for on-the-go interviews, field recordings, or when inspiration strikes outside of a studio setup.
- Ease of Use: iPads come with user-friendly interfaces and a variety of recording apps, making it accessible for both beginners and experienced podcasters. This simplicity reduces the barrier to entry for those new to podcasting.
- Affordability: Compared to purchasing dedicated recording equipment, iPads are relatively cost-effective. This affordability makes podcasting more accessible to individuals or small teams with limited budgets.
- Versatility: iPads can multitask, which lets you use various apps for recording, editing, and even remote interviews. This versatility streamlines the podcast production process.
- Built-in Microphones: While external microphones are often recommended for higher quality, iPads come with built-in microphones that can produce decent recordings.
- Integration: iPads can seamlessly integrate with other Apple devices and services, simplifying the sharing and distribution of podcast episodes.
In this article, we show you what you need for an iPad podcast setup and explain how to record your episodes with just your tablet. Let’s dive in!
Step 1: Gather Your Equipment
The most important part of your iPad podcast setup is your equipment. Here are the items you need to record a podcast on your iPad.
iPad
Obviously you’ll need an iPad as part of your iPad podcast setup. Ideally, you should use the newest generation possible with all of the updates. New models offer better audio and video quality.
External Microphone
A high-quality microphone is essential for capturing clear and professional-sounding audio. Built-in iPad microphones may not provide the desired audio quality, so an external USB or Lightning-connected microphone is necessary to ensure your voice is crisp and free from background noise.
We strongly recommend reading our guide on the best external microphones for iPhone and iPads, but here are some of our favorites.
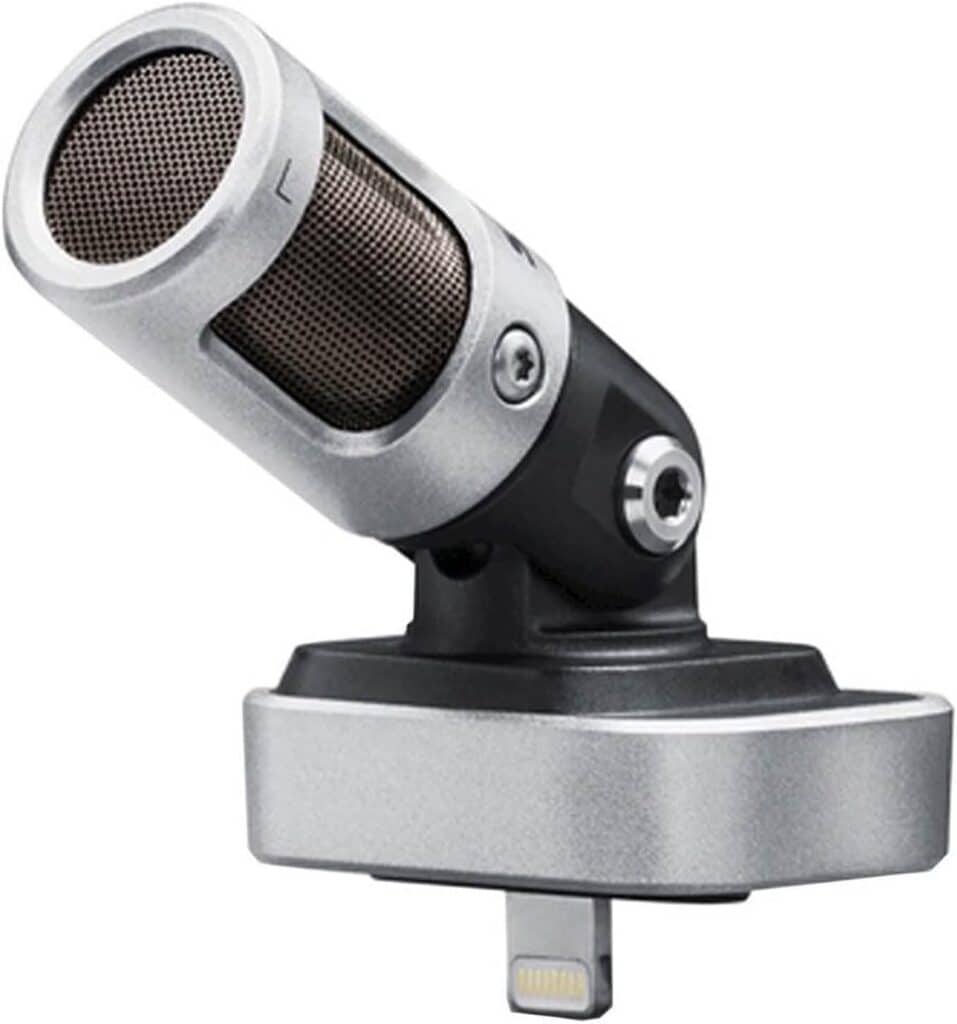
Shure MV 88
The Shure MV88 is a high-quality digital stereo condenser microphone designed specifically for use with iPads and iPhones. It features a compact, adjustable design that plugs directly into the device’s Lightning port, allowing users to capture professional-grade audio for podcasts, music recordings, or videos on the go.
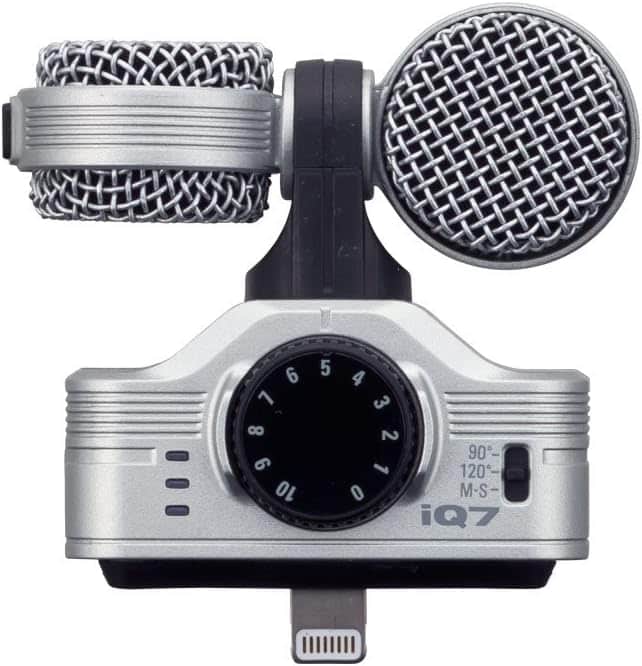
Zoom IQ 7
The Zoom iQ7 is a stereo microphone attachment designed for use with iPads and iPhones. It offers high-quality audio recording capabilities with a unique rotating design that allows users to capture audio in either a 90-degree XY stereo format or a 120-degree wide-angle stereo format, making it versatile for various recording needs.
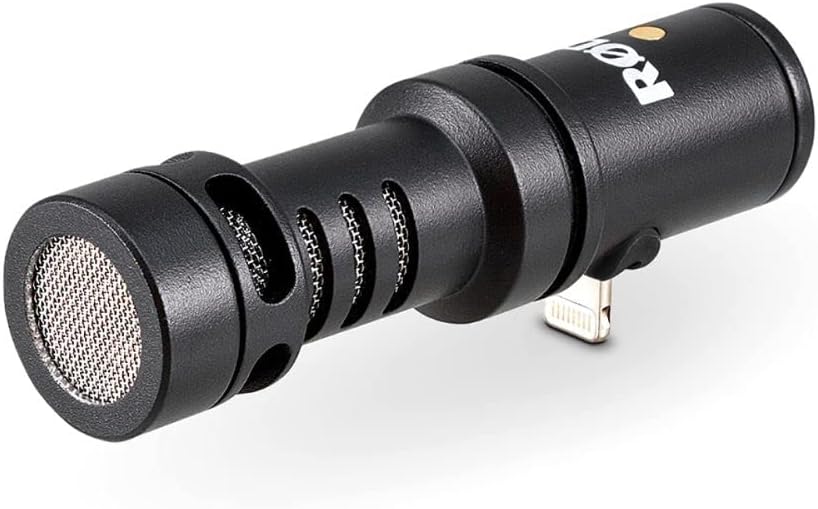
Rode VideoMic Me-L
The Rode VideoMic Me-L is a compact and directional microphone designed specifically for iPads and iPhones with a Lightning port. It enhances audio quality for videos and recordings by focusing on capturing sound from the direction it’s pointed, reducing background noise for clearer audio in a portable and easy-to-use package.
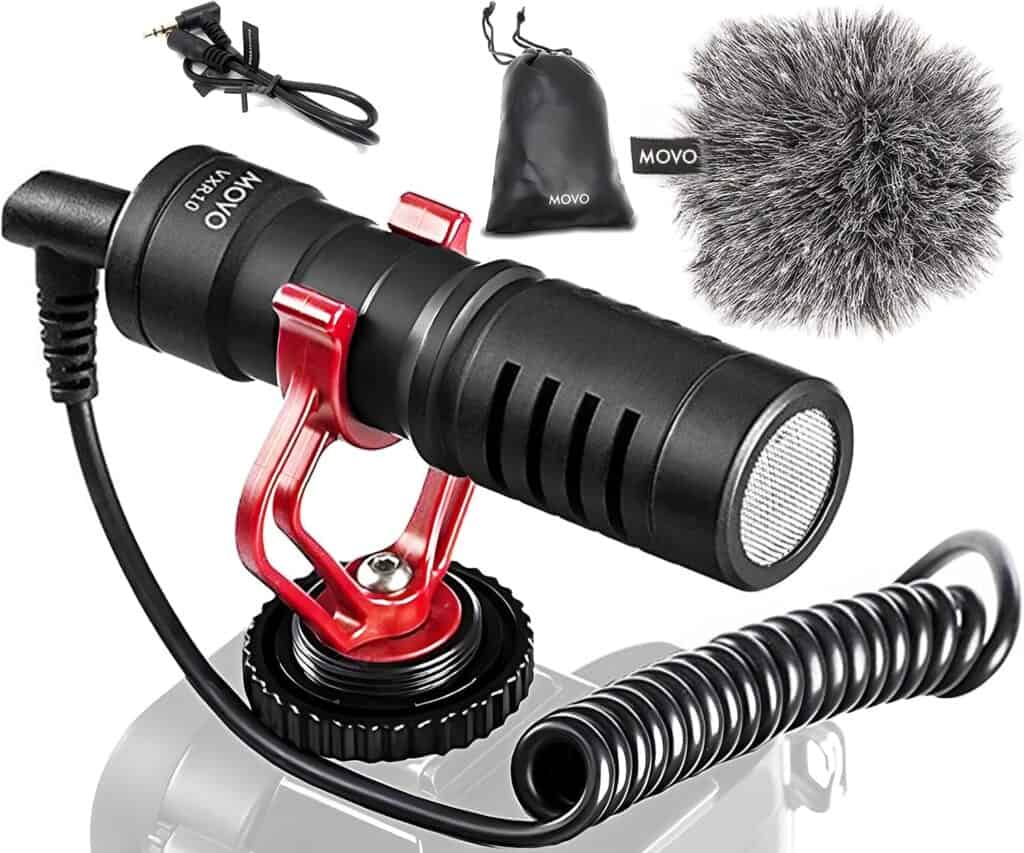
Movo VXR10
The Movo VXR10 is a compact shotgun microphone designed for use with iPads and other mobile devices. It features a cardioid pickup pattern to capture clear audio from the direction it’s pointed, making it a versatile choice for improving audio quality during video recordings, interviews, or podcasting on your iPad.
Headphones
Good headphones help you monitor your audio in real-time, allowing you to catch any issues like background noise, pops, or distortion as you record. They also create a quiet listening environment, helping you maintain focus and deliver a polished podcast.
For some recommendations, check out our list of the best podcasting headphones.
Pop Filter
A pop filter is a screen placed in front of the microphone to reduce plosive sounds like “p” and “b” sounds. It prevents unwanted air blasts from hitting the microphone diaphragm, ensuring your recording remains free from distracting and harsh noises. Your microphone may come with a pop filter or windscreen.
Check out our list of the best pop filters and windscreens for some of our favorites.
Step 2: Use a Podcast Recording App
iOS devices come with a Voice Memos app, but that’s not really sufficient for podcasting. You need a dedicated app that’s specifically designed for high quality audio over a long period of time. Plus, Voice Memos can’t record on multiple tracks or record remote guests.
Which app should you use as part of your iPad podcast setup? We go into detail in our guide on iPhone/iPad recording and editing apps, but here are our favorites:
Step 3: Turn Off Notifications
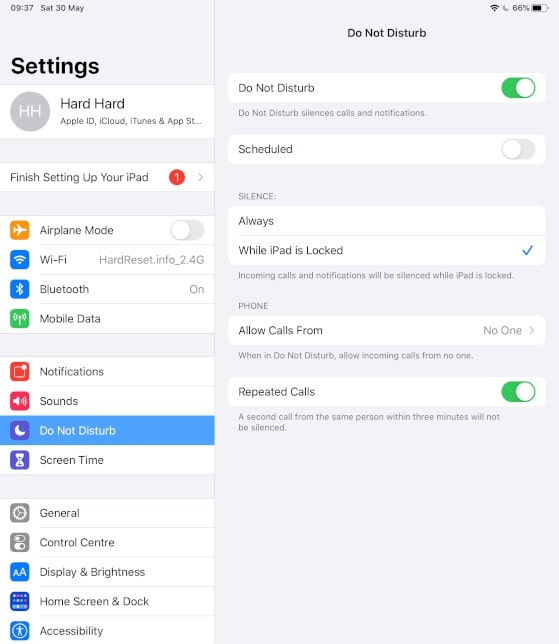
When recording a podcast on your iPad, it’s crucial to minimize distractions. Turning off notifications prevents incoming calls, messages, and app notifications from interrupting your recording. This ensures a smoother recording process and helps maintain your focus.
To do this, go to Settings > Notifications and disable them or enable the “Do Not Disturb” mode.
Step 4: Turn on Airplane Mode
Beyond just notifications, enabling Airplane Mode goes a step further by disconnecting your iPad from Wi-Fi and mobile networks. This prevents any potential interference or unexpected interruptions that could negatively impact your podcast’s audio quality.
Swipe down from the Control Center or access Airplane Mode in Settings.
Step 5: Mount Your iPad
Stabilize your iPad by using a mount or stand. This helps maintain a consistent recording angle and minimizes handling noise. Various iPad mounts and stands are available, from desktop tripod mounts to adjustable arm mounts that can be clamped to a table. Choosing the right one depends on your recording setup and environment, but the goal is to keep your iPad steady during recording.
Step 6: Test Your Audio
Before diving into your podcast recording, take a moment to test your audio setup. Ensure your microphone is working correctly, and the iPad’s audio input levels are appropriate. Use headphones to monitor the sound quality and check for any unwanted background noise. Running a quick test recording allows you to identify and resolve any audio issues before you start recording your actual podcast episode.
Step 7: Create Backups of Your Content
iPad’s aren’t known to crash often, but it’s still important to backup your files so you don’t have to re-record any episodes. Fortunately, Apple offers a built-in feature: iCloud. Regularly back up your podcast files to iCloud or an external drive to prevent data loss.
Consider cloud-based storage for easy access across devices, especially if you have multiple people on your podcast team.
Step 8: Record in a Quiet Place
iPads are mobile, so it’s tempting to record wherever you’re comfortable, such as your kitchen table, on your patio or deck, or even in bed. However, it’s important to consider your recording environment whenever you create podcast episodes.
Record in a quiet place without any background noise. This should be indoors and away from people, pets, and foot traffic. It may seem quiet outside, but the wind, passing cars, sirens, and general commotion of people will make its way into your recording.
Opt for a place with lots of soft surfaces that absorb sound and prevent echoes. Sit in a comfortable podcasting chair at a table so your body is upright and producing the clearest sound. Set your iPad on the table or desk so it’s at a consistent distance from your mouth.
Step 9: Spend Time in Editing
People generally record with their iPad because it’s simple and easy, but that doesn’t mean you should skip the editing process. Use an iOS editing app to help you make some basic edits to your show. You don’t have to get deep into audio engineering, but some volume control and splicing out long pauses can go a long way toward making your show a better listening experience.
Check out our list of the best iOS editing apps to find the app that’s right for you. Some of those tools are far more sophisticated than you might expect!
Step 10: Take Audio Quality Seriously
Your audio quality directly impacts the overall quality and professionalism of your content. High-quality audio ensures your message is clear and easily understood, making a positive impression on your audience. Poor audio quality, on the other hand, can be distracting and may lead listeners or viewers to tune out.
Secondly, audio quality significantly influences the overall user experience. Good sound enhances engagement and retention, ensuring that your audience remains captivated by your content. In contrast, subpar audio can frustrate listeners, resulting in lower engagement and potentially harming your reputation.
iPad Podcast Setup FAQs
Here are some common questions people ask about their iPad podcast setup and recording a podcast with an iPad.
Can I record a podcast on my iPad using built-in apps?
Yes, you can use the Voice Memos app on your iPad to record basic podcasts. However, for better audio quality and more advanced features, consider using dedicated podcasting apps like GarageBand or third-party recording apps that offer more control over your podcast production.
What accessories do I need for podcasting on my iPad?
To enhance your iPad podcasting setup, you may need a quality external microphone, headphones, a pop filter, and potentially a microphone stand or mount. These accessories can significantly improve audio quality and recording convenience.
How can I edit and produce my podcast on an iPad?
You can use apps like GarageBand, Ferrite Recording Studio, or Adobe Audition Rush for iPad to edit and produce your podcast. These apps offer editing tools, sound effects, and the ability to mix and export your podcast episodes.
Is it possible to conduct remote interviews on my iPad for my podcast?
Yes, you can conduct remote interviews by using video conferencing apps like Zoom or Google Meets on your iPad. Record the audio separately, ensuring each participant has a quality microphone, and then edit the audio in post-production to create a seamless podcast episode.
What’s the best way to minimize background noise during iPad podcast recording?
To reduce background noise, record in a quiet environment, use a directional microphone with noise-canceling capabilities, and consider acoustic treatment like foam panels or a portable vocal booth. Additionally, enabling the “Do Not Disturb” mode and turning on Airplane Mode can help minimize interruptions and interference.
How can I publish my podcast episodes from an iPad?
You can publish your podcast episodes by using a podcast hosting platform like Castos. These services allow you to upload and distribute your episodes to various podcast directories like Apple Podcasts, Spotify, and Google Podcasts directly from your iPad.
What are the best practices for storing and backing up podcast recordings on an iPad?
It’s essential to regularly back up your podcast recordings to iCloud, Dropbox, or another cloud storage service. Additionally, consider using an external storage device or an iPad with ample storage capacity to ensure you have enough space for your podcast files. Backing up your work is crucial to prevent data loss.
What’s in Your iPad Podcast Setup?
When it comes to podcasting, there are plenty of best practices, but at the end of the day everyone creates content differently. What equipment do you use in your iPad podcast setup? What tips do you have to make recording on an iPad easier? Let us know in the comments.
