How to Build a DIY Video Lighting Kit (Budget-Friendly Tutorial)

Great lighting is a key element of creating high quality video content. If you want to produce engaging videos, video podcasts, livestream, or even short social media content, it’s imperative that you take lighting seriously.
You could spend thousands on professional lighting gear, but you don’t have to. If you follow the basic principles of light management, you can produce impressive results with simple items from your home or the local hardware store. This is important for anyone just starting a podcast who isn’t willing to invest much.
In this article, we explain how to build your own DIY video lighting kit. If you follow this advice, your videos will have great lighting for less than $150.
What is a DIY Video Lighting Kit?
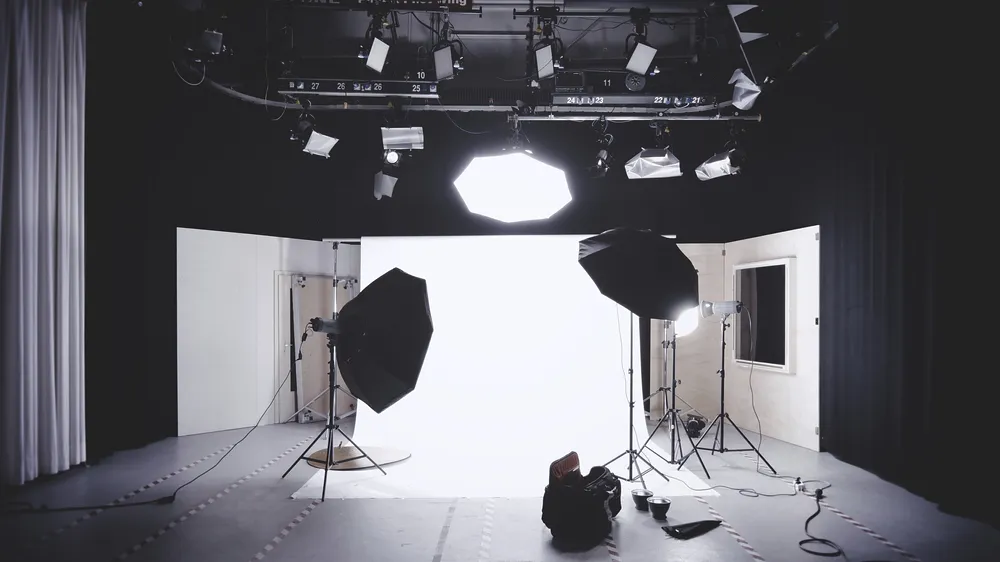
A lighting kit is a small collection of gear used to produce quality lighting for video content creation. In most cases, this includes a three- or four-point lighting setup. Lights are placed strategically to achieve optimal lighting.
What’s included in a typical lighting kit?
- Key light: The brightest light source that shines directly on the subject
- Fill light: A smaller, less intense light that’s directed at your face.
- Backlight: Another small light that illuminates the background.
- Light reflector: A reflective surface that spreads light to soften shadows.
- Grip gear: Various pieces of equipment that keep everything stable, such as light stands, A-clamps, C-stands, extension cords, sandbags, or gaff tape.
- Light modifier: Black plastic that blocks unwanted light, modifies your light, or controls light spillage.
Seems like a lot of gear, doesn’t it? Don’t worry. While it’s true that professional lighting equipment could set you back thousands of dollars, you can produce the same effect with items you have around the house or picked up at your local hardware store.
DIY Lighting Kit Shopping List
Before setting up your DIY lighting kit, you’ll need to pick up a few items. All of these can be purchased at Home Depot, Lowes, Ace Hardware, or other hardware stores. You could probably grab some items at Walmart, as well.
- Black trash bags
- Masking tape, painter’s tape, or gaffer tape
- Pure white shower curtain
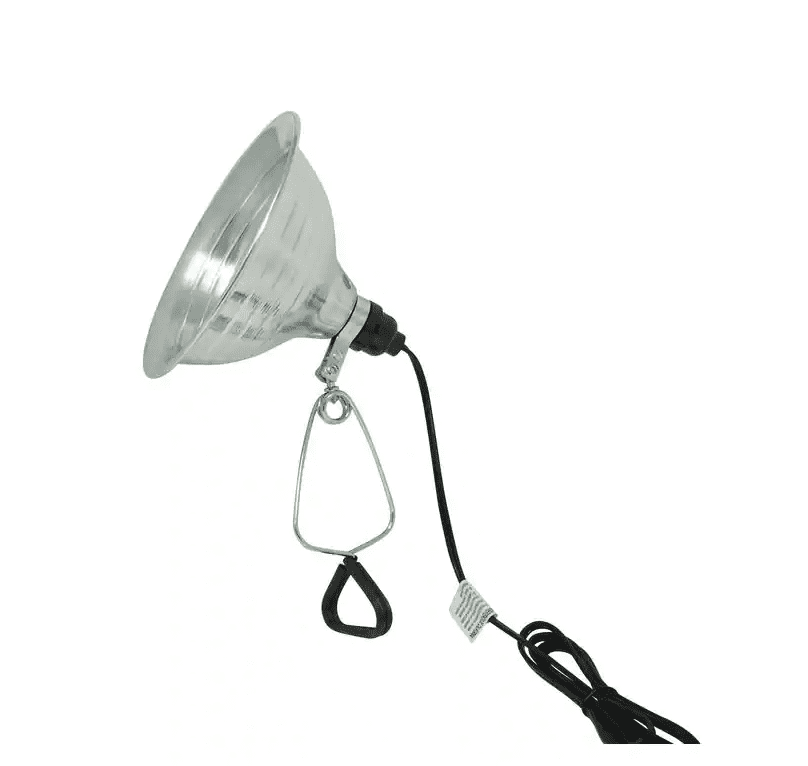
- Clamp lights (get at least three)
- Plug-in dimmer (one for each light)
- High-wattage dimmable LED bulbs that fit your clamp lights
- Spring clamps
- Extension cord
- Package of clothespins
- Light stands (3)
The light stands are the only components you can’t get at a hardware store. Technically you could build your own from materials at the hardware store, but this will probably be more expensive than just buying a few affordable options off Amazon. This one is an affordable option, as well as this one and this one.
Keep in mind that these recommendations are for your first lighting setup. As your podcast, YouTube channel, or social media audiences grow, you should eventually level-up to professional equipment. Proper gear will always produce the best results, give you more control, and last longer.
Setting Up Your DIY Video Lighting Kit
Now that you have everything you need, let’s walk you through the steps of creating your own DIY video lighting kit.
Step 1: Block out unwanted light with trash bags
Your first step is to block out ambient light from windows or adjacent rooms. In fact, it’s best to start with a completely dark recording space if you can.
Cover your windows and any sources of unavoidable light with black trash bags. Depending on the size of your windows, you may need to tear each bag down the seam. Tape it over your windows from corner to corner, blocking all light. You may need to use multiple layers if you have a lot of light coming through still.
Don’t throw away your trash bags when you’re done! They can be used over and over.
Step 2: Clip your clamp lights to the top of your light stands
Use the clip at the bottom of your clamp light to attach the light to the light stand. The clips are serviceable, not usually not that strong, so you may need to use one of the spring clamps for extra support.
Don’t attach your clamp lights to the stand in any permanent way. You want the ability to change their direction in the future. You may also need to pack the whole DIY video lighting kit away.
Step 3: Create custom light diffusers from the shower curtain
Professional lights place a diffusion material in front of the bulb to diffuse the beam. This illuminates a wider area, and makes the light softer and less directional. You can diffuse the light from your clamp lights with the shower curtain.
Cut the shower curtain into two 12-inch squares. Use the clothespins to attach the squares to the front of two of your lights. This will diffuse the light so it flatters your face.
Leave the third light uncovered. This is your backlight.
Step 4: Plug in the dimmer switches to your lights
If your lights are still too bright (and they probably will be if you’re using 100W bulbs), you’ll need to use the dimmers. Using dimmers gives you much more control over the lighting in the environment, which is helpful if you have to deal with ambient light or a hard-to-light set. (Yes, even some people are more challenging to light than others!)
First, check that you purchased dimmable lights. If they aren’t dimmable, they will just flicker once you adjust the dimmer. Check the light bulb package, not the light itself. Some bulbs will flicker almost imperceptibly, but you might see it on the video recording.
Next, plug each light into its own dimmer. Power them up and use the dial on the dimmer to reduce the brightness until you’re happy with the lighting.
You now have two key lights. If you want one of those lights to be the fill light, simply use the dimmer to turn it down. (More about this in a moment.)
Step 5: Place your lights, camera, and subject carefully
Your final step is to place all of your gear in the right spots for optimal lighting. Your goal is to eliminate shadows and place soft, flat lighting on your subject’s face.
Unless you’re going for something artsy, you’ll most likely want to use the standard three-point lighting technique. This setup is a great way to reduce shadows, create dimension, and make your videos look more professional. It’s also helpful if you’re using a green screen because it creates separation between the subject and background.
For three-point lighting, you need a key light, a fill light, and a backlight. In some cases, you might find it helpful to have an additional light (with a piece of shower curtain attached for diffusion) pointed at your background.
Stream Yard (a professional live streaming and recording studio that runs in your browser) has a great guide on three-point lighting systems. This is what it looks like when set up:
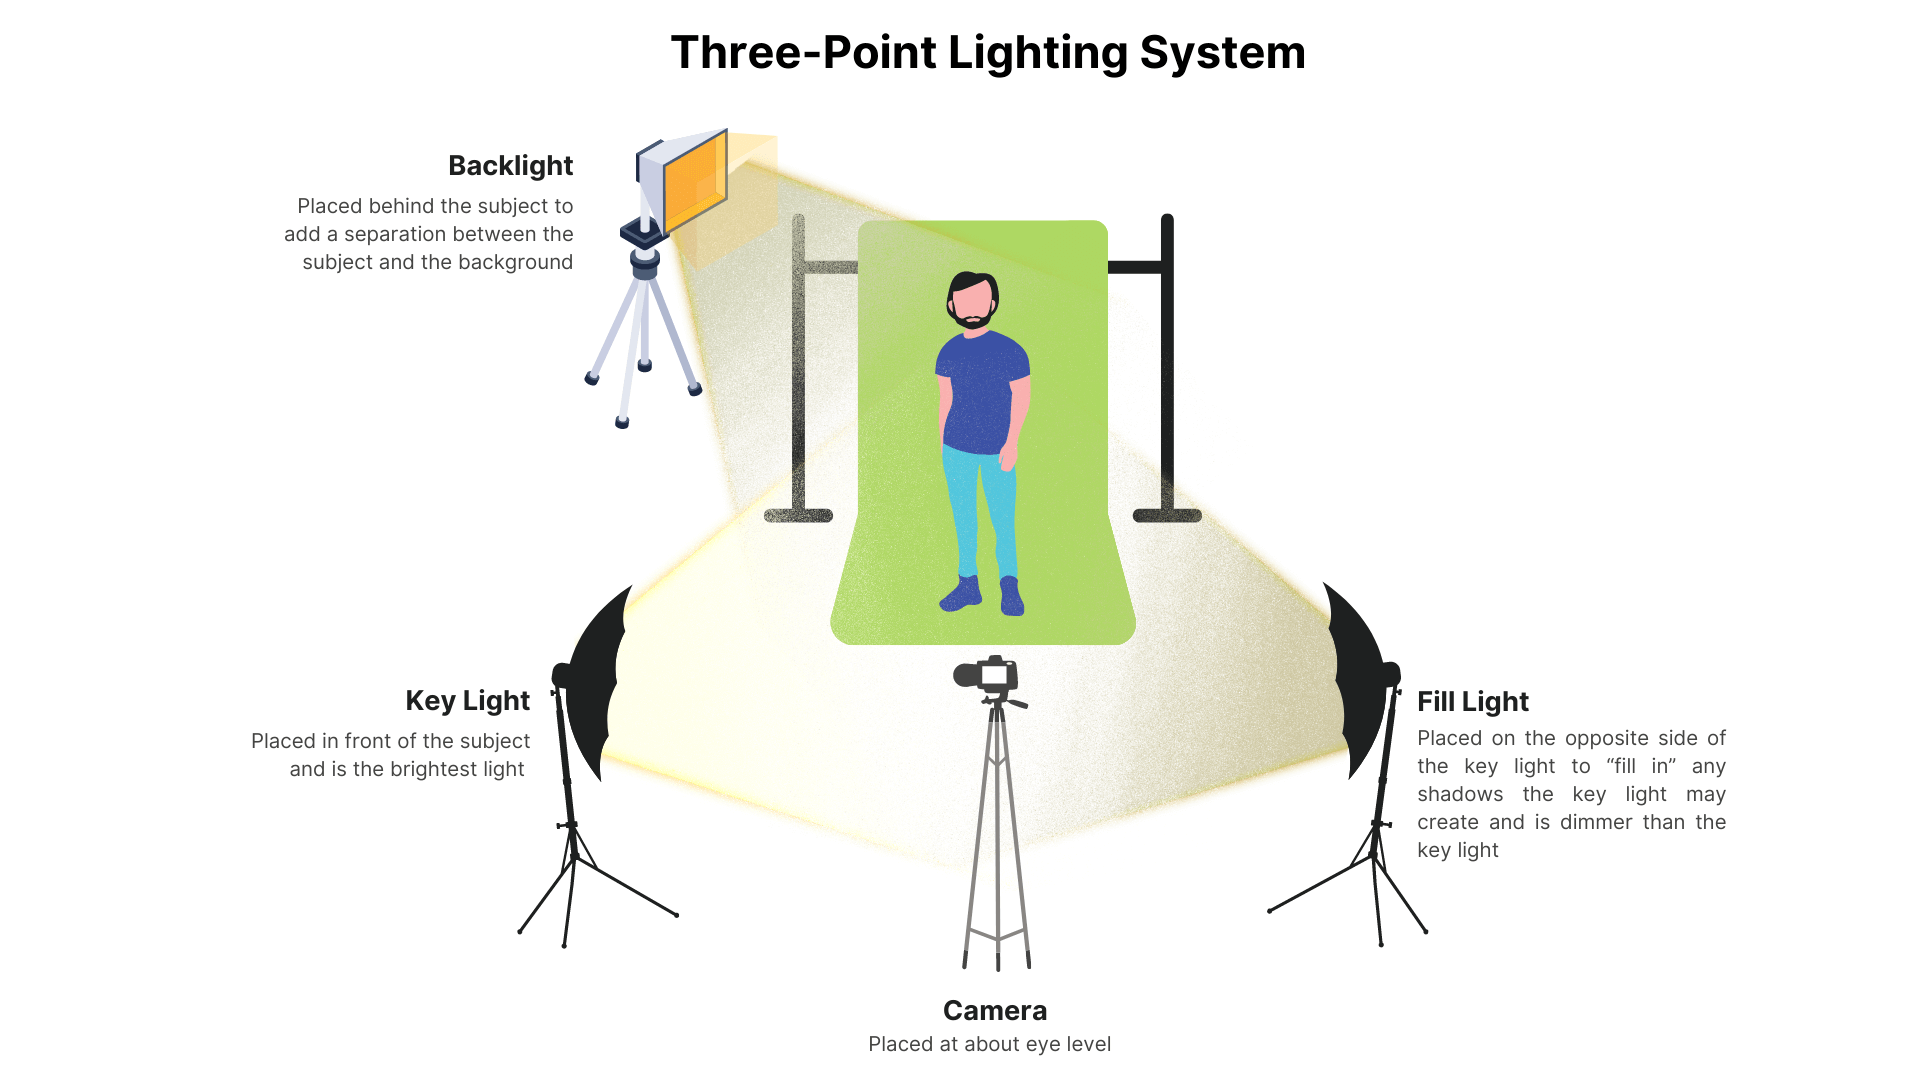
Your key light is your primary light. Typically, this light is placed in front of the subject and slightly to one side (but mostly to the front). It should be the brightest light in your setup.
The fill light is also slightly to the side, but opposite the key light. The purpose of the fill light is to eliminate any shadows that the key light creates. This light should be 50-75% dimmer than the key light and positioned at an angle so that it brings out detail on the subject’s other side.
The backlight sits behind the subject. Its purpose is to separate the subject from the background to give the room a better sense of space. Position it on the same side and angle as the key light, but higher than the other lights.
Tips for Quality Lighting
Finding the right lighting takes a bit of trial and error. How you can figure your lights will change depending on your subject and setting. Here are some tips to help you get quality lighting.
- The best place to set up a lighting system is a room with white walls or a plain background. Complex patterns and weird angles are harder to light.
- Choose a place that offers enough room to set up all of your stands. If your equipment is too close together, it will create hard-to-eliminate shadows.
- Your key lights and fill light should be about three feet away from the subject.
- Adjust your lights until you are happy with the results. You don’t have to follow any rules or best practices. Create the light that’s right for your video.
- If you need to remove your lighting from the recording space, consider putting tape on the floor to mark the position of your stands.
- Be mindful of heat output from the lights. Depending on the type of light and/or light bulbs you have, they may produce a lot of heat.
- Make sure none of your equipment can be seen in the camera’s frame.
What’s in Your DIY Video Lighting Kit?
As you can see, it’s fairly simple to create your own DIY video lighting kit. How do you produce quality light for your videos? Tell us your tricks in the comments.
Launch Your Podcast In Minutes
Castos makes launching simple with one-click setup, automatic distribution to all platforms, and professional hosting. No technical skills required.
Start your 14-day free trial