The Best Podcast Equipment for Beginners (2025 Roundup)

Looking for suggestions for the best podcast equipment for beginners? Wondering what equipment to get to start podcasting?
Whether you’re a new podcaster looking for setup inspiration or a seasoned host looking to upgrade your studio, you’ll find great recommendations below.
Castos is a participant in the Amazon Services LLC Associates Program. We may earn commissions from your purchases on Amazon.com, though at no cost to you.
Why so much fuss about podcast equipment?
Isn’t just having a computer enough to get started?
Well, technically, yes. Then again – It might not be enough if you want to produce a great-sounding podcast and not scare potential readers away with bad audio or production. Hence so much focus on choosing the right equipment.
(Unfortunately, choosing what to get can be quite daunting.)
Consider this – I recently saw a podcasting Facebook group debate the main reasons aspiring hosts never take the leap. Can you guess one of their main fears? Yup, it’s feeling uneducated about what podcast equipment to use and which podcast studio setup is best.
Starting a new project with little knowledge about the necessary tools and software is daunting, after all. There’s new jargon, high prices, and a nagging feeling that there might be something better out there if you just keep researching.
Well, I’m here to save you hours of guesswork. Below, you’ll find a no-B.S. guide to the best podcasting equipment for any budget based on my 10 years of podcasting and my experience with countless tools.
Our guide is broken out into starter kits with the nine essential tools every beginner needs. Then we put together equipment packages that range from $20-$500 from our top recommendations.
In this article, we’re going to help you choose the right podcast equipment for your needs.
Here’s what we’ll cover
It’s a lot to cover, so let’s get right to it.
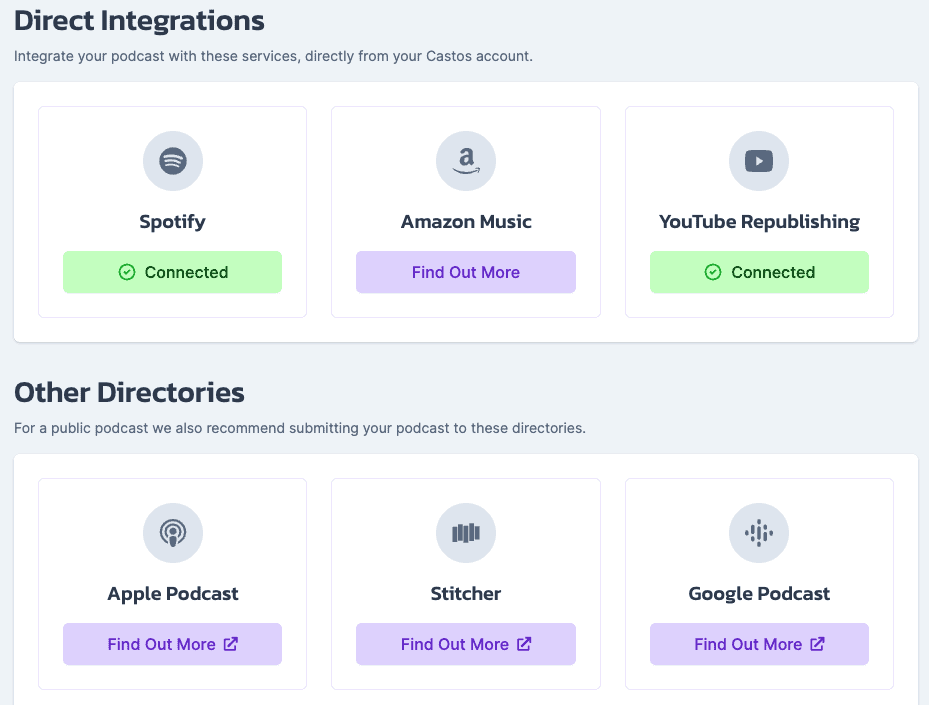
Automatically publish your episodes to dozens of podcast directories
With Castos you can send all of your podcast content directly to directories like Apple Podcasts, Spotify, Amazon Music, Stitcher, Google Podcasts, and many others.
Meet your audience where they already listen to podcasts!
No Credit Card Required
Let’s start with all podcast equipment that you could get
As you’ll see shortly, there are so many types of equipment for podcasting. And there are so many brands and specific tools that you could get in each category.
Do you need it all? No, of course not. Some of these items are essential, while others are merely nice to have’s.
For that reason, I divided the list below into three categories:
-
Essentials – This is the podcasting equipment you absolutely must have to start a a podcast,
-
Next-level equipment – Recommendations in this category will help you to step up your game and improve the professionalism of your show.
-
The pro game – Finally, in this list, you’ll find items that the absolute pros use to take their shows to the top.
Part I. Essential Podcasting Equipment
In this section, you’ll find all the equipment you need to start a podcast and deliver a great-sounding and engaging show to your audience.
Computer
A computer is essential to podcasting because you’ll want to use a digital audio workstation (DAW) to produce your show. That means using a recording and editing software to make the final episode sound cleaner and more professional.
Computer wise, Mac or PC work just fine. Same for desktop or a laptop. If you prefer one to the other, we suggest using the equipment you already know how to use. One factor to be aware of is DAW software like Logic Pro and GarageBand only work on Apple products. But there are many options covered below that work on both operating systems.
If you want to purchase a new machine for your podcast setup, consider its memory space, processor, and type of USB ports. For beginner podcasters, computers with 8GB of Random Access Memory (RAM),some built in Solid State Device (SSD) storage, and a triple-core processor will do the trick.
Here are our top recommendations for the best computers for podcasting:
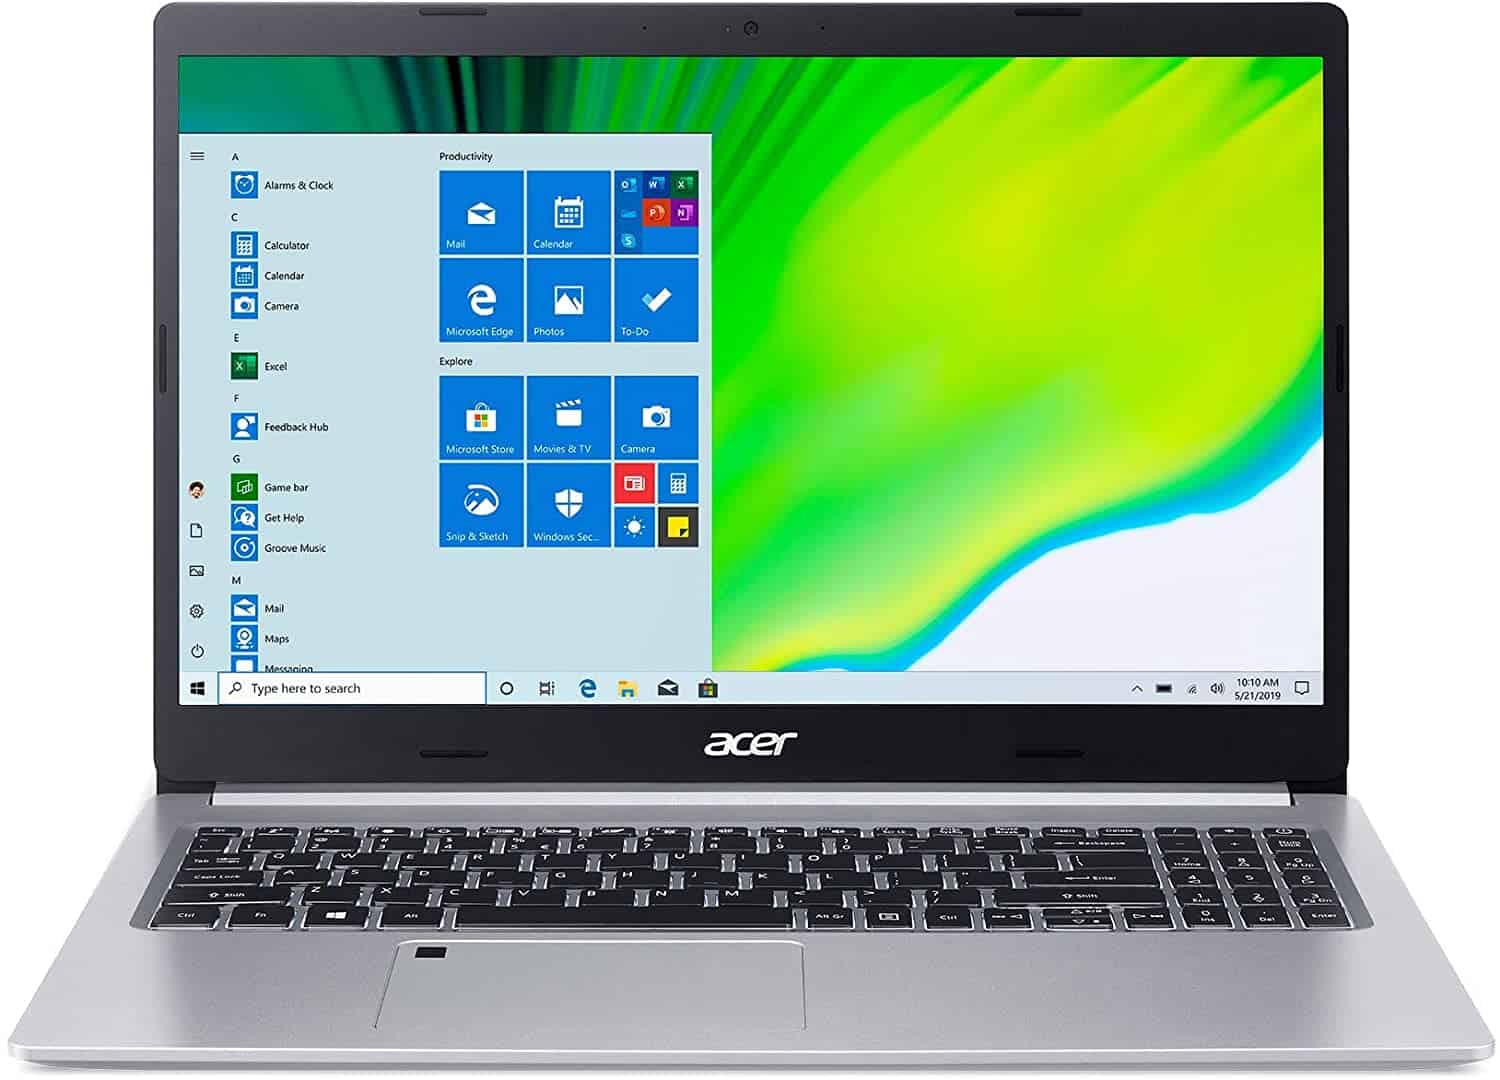
Acer Aspire 5 laptops
Budget friendly laptop for beginners. 15″ Screen, 4GB RAM, 12-hour battery life, 128GB of SSD storage, a speedy quad-core processor, and a variety of USB ports (Type-C, 3.0, and 2.0) and HDMI port. Starts at $399.
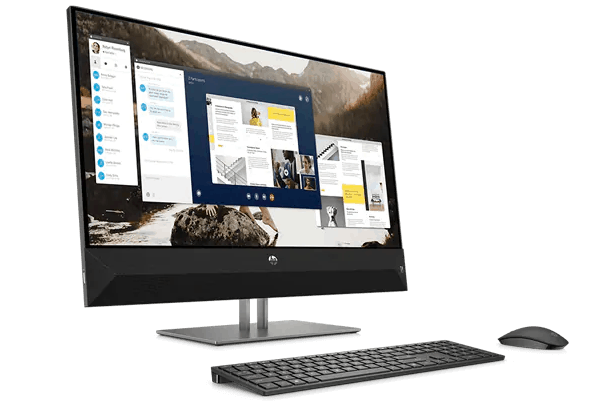
HP Pavilion All-in-One
Affordable desktop computer for beginners. 16GB RAM, 256GB of SSD storage, a 6-core processor, and a variety of ports from multiple USB ports, HDMI, and an SD card reader. Starts at $1,299.
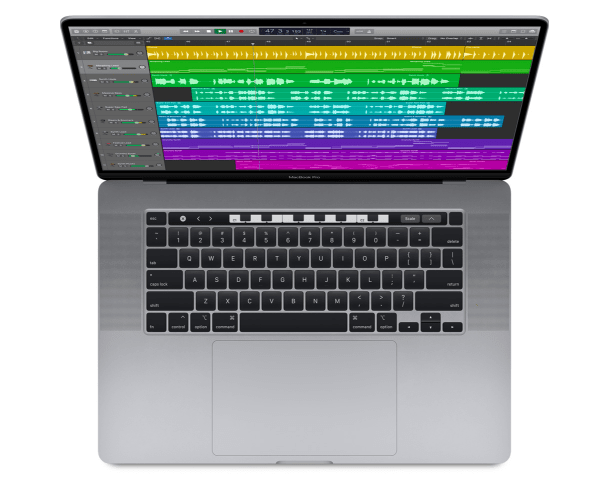
Apple MacBook Pro M1
Most expensive laptop for beginners and advanced podcasters. 16GB RAM, 10-hour battery life, 512GB of SSD storage, a 6-core processor, and 3 ultrafast USB Type-C ports. Starts at $999.
XLR or USB microphone
A podcasting microphone is probably the most critical piece of equipment. It affects your sound quality and can save you time in post-production. Unsurprisingly, there’s a lot of discussions around which mic is the best.
There are differences around how the equipment connects to your computer, XLR or USB. And the difference between how sensitive and crisp sounding it is, dynamic versus condenser. Here’s how they stack up:
-
XLR podcasting microphones: has a 3 prong connection and is connected to a mixer and the computer. Typically used in professional setups.
-
USB podcasting microphones: connects directly to the computer via a USB port. Typically used by beginners who prefer an easier setup and less equipment.
-
Dynamic podcasting microphones: less sensitive to ambient noise but can have less a crisp and layered sound. Typically used by beginner podcasters who record in DIY studio spaces.
-
Condenser podcasting microphones: more sensitive to high frequencies and environmental noise. Typically used in recording studios with robust acoustic treatments.
Tip
For a more in-depth look at your microphone options, check out our more detailed XLR vs USB podcast microphone article.
Based on these combinations, these are our three top podcast microphone recommendations:
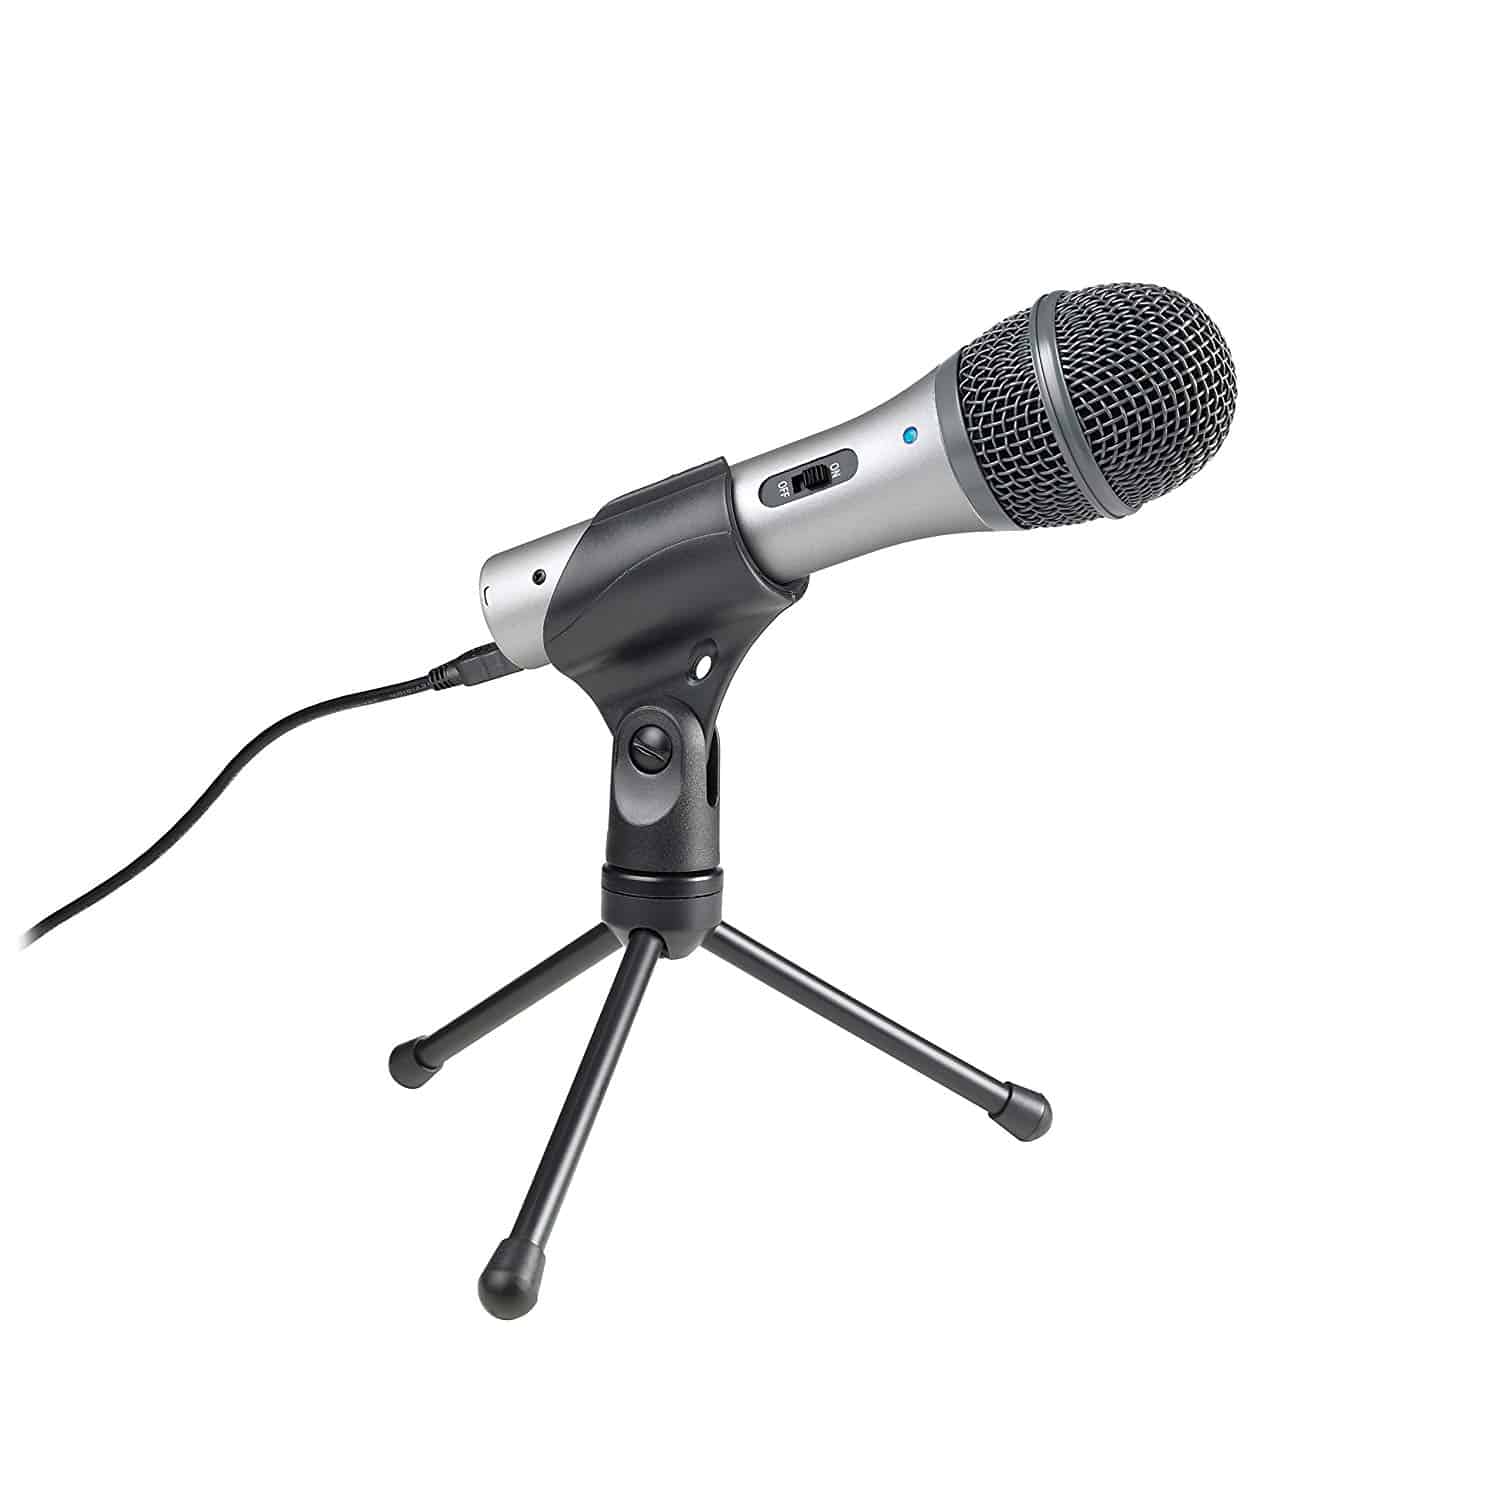
Audio Technica ART2100x
Easy to set up and affordable for beginners, it’s the microphone choice for folks like Tim Ferriss. It’s a dynamic mic for more forgiveness in imperfect recording conditions and has a solid depth of voice at this price. Can be connected with XLR cables or USB depending on your podcast setup.
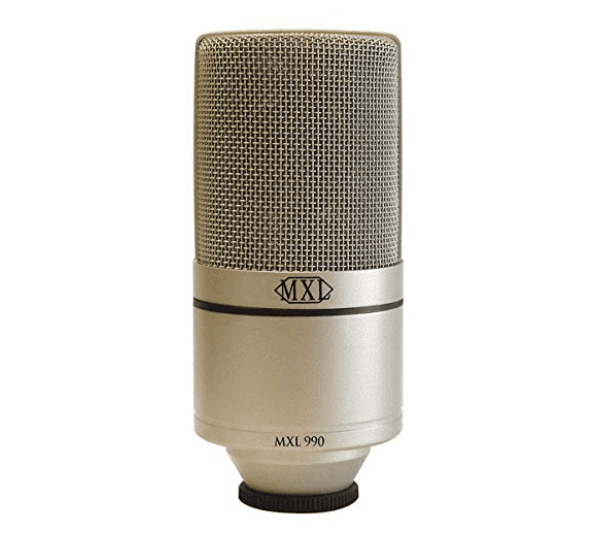
MXL 990 XLR Condenser
Great starter XLR, condenser microphone that still works well in home recording studios. It comes with a custom shock mount, mic stand adapter, and carrying case.
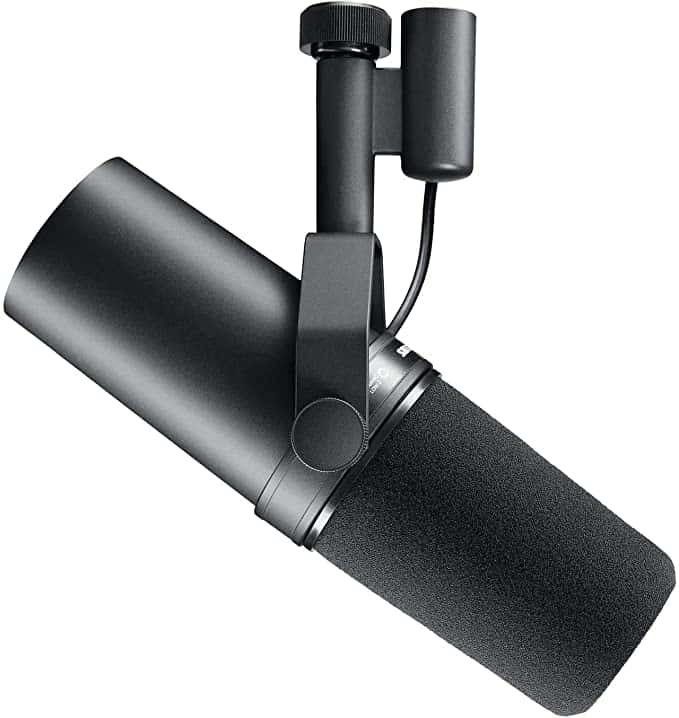
Shure SM7B
Popular among professionals but expensive. An XLR, dynamic mic with a built-in pop filter. It also has multiple settings to better capture the qualities of male versus female voices. Its components shield against external hums and it has an internal suspension system to eliminate light vibrations.
Read our full review of the Shure SM7B
More resources you might find helpful:
-
The best DSLR microphones (designed to work with DSLR cameras)
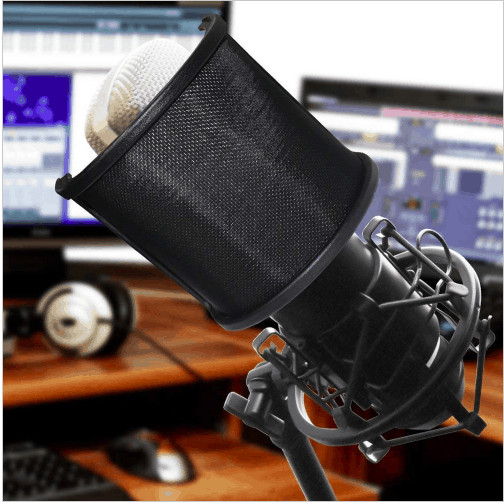
Pop filter or windscreen
Pop filters or windscreens both reduce the plosive sounds we make when saying words with hard P or T sounds like “please”. A pop filter is typically a foam or mesh screen fixed in front of the microphone while a windscreen fits over the top of the mic.
If your podcast microphone doesn’t come with either built-in, this piece of equipment doesn’t break the bank and results in a much smoother sound. There aren’t too many differences between the top contenders so pick based on your microphone preference.
Here are our top three pop filter recommendations for your podcast setup. (You’ll find more in our complete list of the best pop filters.)
PEMOTech Pop Filter
Easy to set up and suitable for a variety of microphones. A combination of metal and foam layers to help get your best vocal recording.
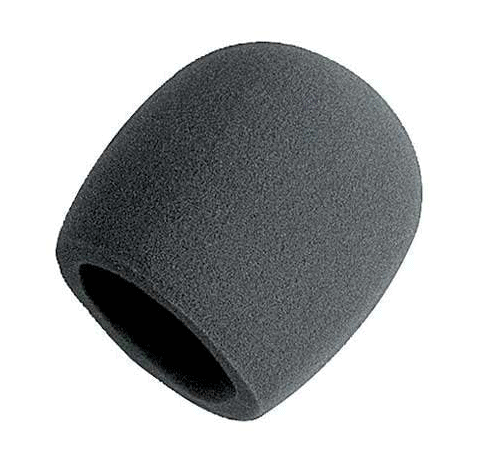
On-Stage Foam Windscreen
Designed to fit majority of standard sized mics and comes in three colors. Pop it on the top of your microphone and go.
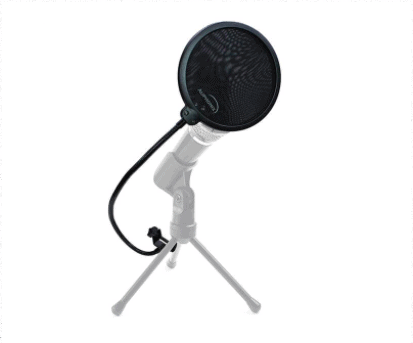
AUPHONIX Pop Filter
This mesh pop filter quickly clamps around any round mic stand and can bend to all 360 degree angles.
Podcasting headphones
When it comes to headphones, almost anything will do in the beginning. While we think they’re a non-negotiable part of a podcast setup, you don’t need to spend hundreds of dollars right away. The standard Apple headphones or anything that you use to listen to music, are fine to start. One important note is everyone who is recording should wear their own set.
If you decide to buy something, pick up over-the-ear headphones. They offer better sound quality to more accurately hear what your audio sounds like.
Here are our favorite options to add to your podcast starter kit. (See more of our favorites in our list of the best podcast headphones.)

Sony MDR 7506
The closed ear design is comfortable for long wear and the set has a nine foot cord so you have plenty of room to build your optimal podcast setup. They don’t artificially boost your frequencies so what you’re hearing is exactly how you sound.
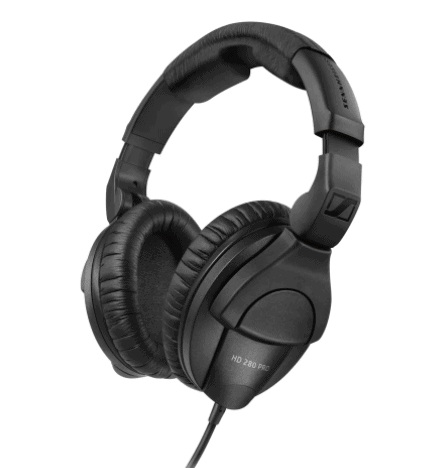
Sennheiser HD280 Pro
The Sennheiser headphones also offer a closed ear design with padded ear cups. A bonus with this set is the ear pads, headband padding, and audio cord are all easily replaceable for a long life. This set produces a warm, natural sound reproduction and is a perfect option for beginner podcasters.
Recording and editing software
The recording space is set up and the podcasting equipment purchased, now it’s time to hit record. But first you’ll need a digital audio workspace (DAW) to capture the audio and edit it to perfection. Whether you’re using a Mac or PC, there are multiple options for recording and editing software to choose from.
Our top picks are all beginner-friendly, can record and edit audio files, and won’t break the bank. Which one you go with depends on how many bells and whistles you want, plus which operating system you use.
Here are our top six podcast recording and editing software recommendations to add to your podcasting kit:
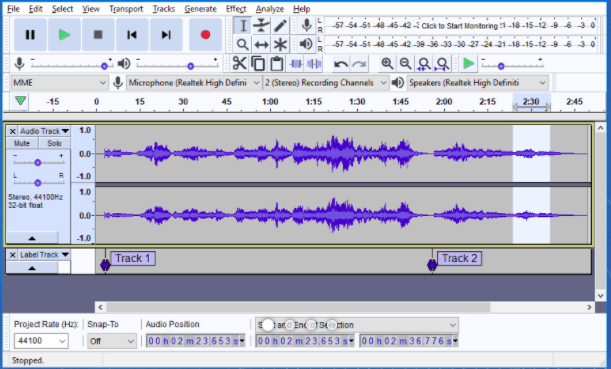
Audacity
An industry favorite for good reason. It’s free, easy to use, and has all of the essential features you need to capture crisp audio and clean it up in post-production. We recommend Audacity to all beginners since there aren’t any startup costs and there are hours of video tutorials to help you get started.
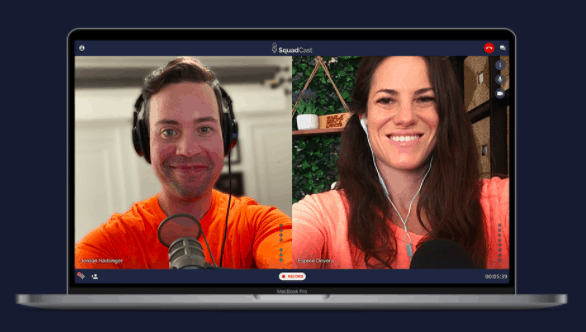
SquadCast
This software only records audio but is the best tool on the market for remote interviews or co-hosts. Record each person on a separate track and capture clear audio regardless of internet speeds. Pair SquadCast with Audacity for a low-cost DAW combination. Learn more about Squadcast.
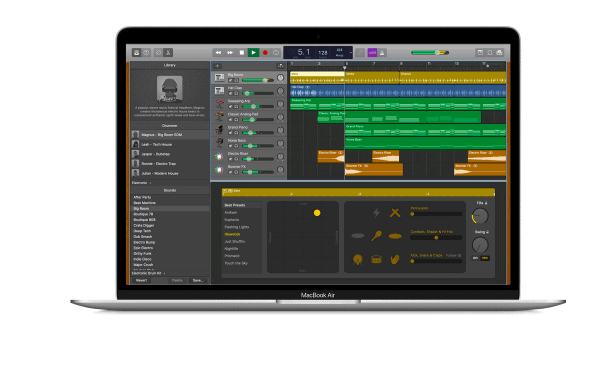
GarageBand
For Mac computers only, GarageBand is another beginner level software that’s free to download. The only major downside is its inability to record multiple guests on separate tracks. This isn’t an issue if you host a solo podcast but we caution against using GarageBand to record multiple people at the same time.
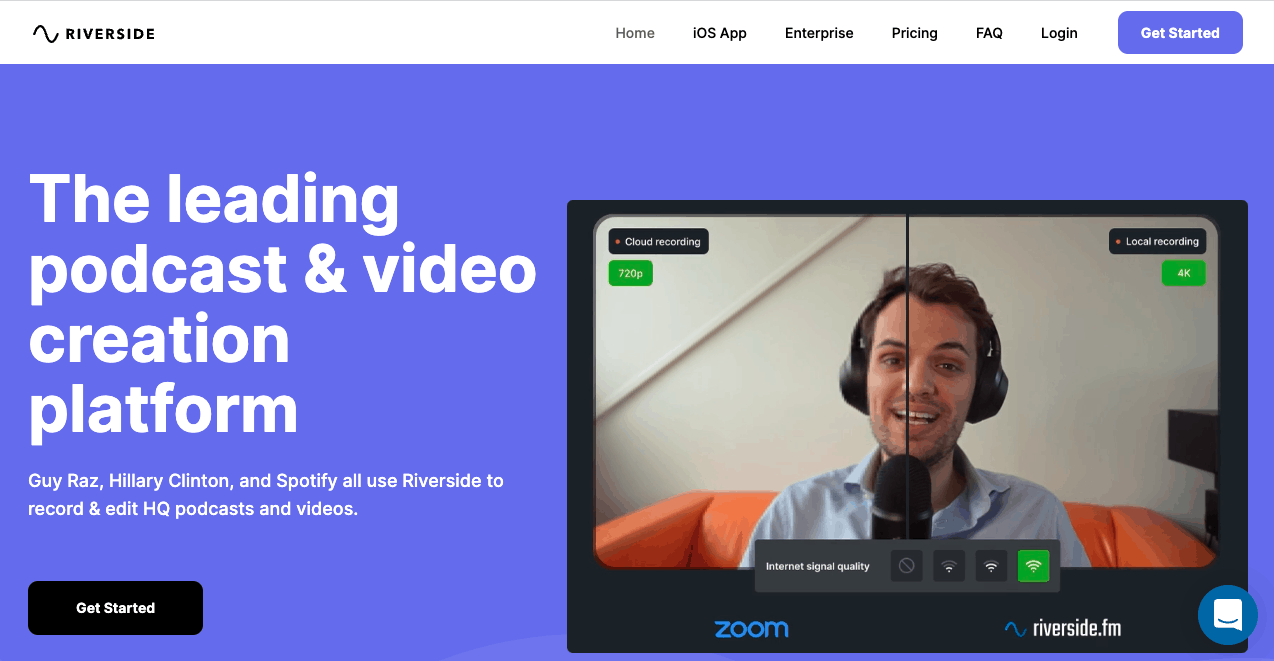
Riverside
Riverside is a browser-based audio and video recording tool that’s taking the podcasting world by storm. With the ability to record high fidelity audio and video simultaneously, Riverside offers an easy to use tool that’s fairly priced for all the power under the hood. Learn more about Riverside.

Hindenburg Journalist
This software is designed specifically for spoken audio and is available to PC and Mac users. Its features let you record, add sound effects and music, and edit audio files with multiple mastering options. A basic subscription starts at $95 and the Pro software is $375.
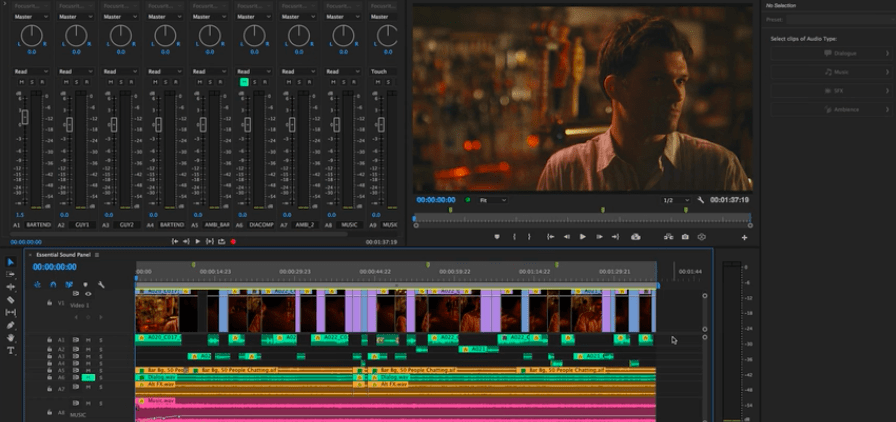
Adobe Audition
This is an advanced and expensive option that’s best suited for podcasters who have experience with DAWs. It has podcasting specific features aimed to improve spoken word audio. But at a $20.99/month subscription, it’s a costlier investment especially if you’re not using the software to its full advantage.
Podcast hosting provider
It’s a common misconception that podcasters upload their shows directly to listening apps like Apple Podcasts or Spotify. In reality, podcast content is distributed via RSS feeds. A podcast hosting provider helps create your feed and automatically publishes new episodes to every listening platform as you upload content.
When researching podcast hosts, it’s important to consider the tool’s storage, separate podcast, and bandwidth or download capabilities, analytics features, content promotion integrations, and website creation options.
While we’re biased on the best podcast hosting provider, here are a few of our other favorites:
Castos
We help podcasters not only host their podcast but also grow it. Every plan includes unlimited storage, unlimited podcasts, and generous download limits on all plans, advanced analytics reports, and a customizable web page to serve as the home base of your podcast. Plus there are free transcription services right from your dashboard and the option to create private, password protected podcasts. Advanced plans offer additional integrations with Headliner and YouTube to amplify your podcast promotions. Castos also has a free WordPress podcasting plugin so you can manage all of your content directly from WordPress.
![]()
Captivate
Another affordable podcast host option but each plan includes monthly download limits. Potentially not a problem to start but if the goal is creating a popular podcast with thousands of downloads, this will result in higher costs. The tool does offer analytics and a built-in podcast website and the option for private podcast feeds for advanced plans.
Buzzsprout
Buzzsprout has a free plan if you’re on a budget. For just covering the basics of what you need out of a podcast hosting platform it certainly does the job. As your show grows you can level up to higher paid tiers which unlock more bandwidth and features.
Part II. Podcasting equipment to take your show to the next level
Mixer
Mixers are used to improve audio quality and offer multi-channel recordings for those with co-hosts or guests. It’s also a required piece for anyone using an XLR microphone. Adding a mixer to your podcast setup creates a new opportunity to record live episodes with AUX features. These recording sessions act similarly to Joe Rogan’s setup where he records everything in one go and adds music and sound effects during an interview. There’s minimal to no post-production for the final cut.
There are a lot of truly advanced mixers on the market (we explore them in our list of the best audio mixers) but there are two key features to look out for. They include the number of channels and an AUX out feature.
Our three top podcast mixers have varying combinations of these options:
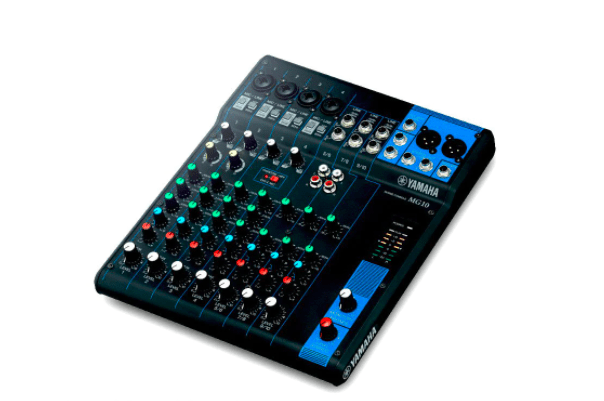
Yamaha MG10 or MG06
The MG10 mixer has a 10-channel console that allows 4 microphone inputs. It includes 1 AUX send to incorporate additional sound effects or music while recording. Or try the MG06 option if you only need two mic inputs and don’t need the AUX live podcasting features.
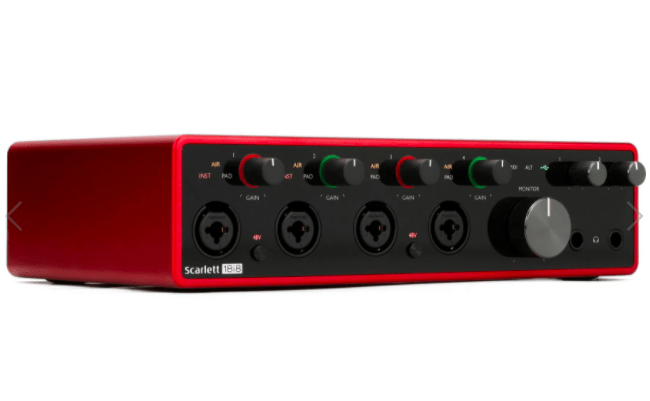
Focusrite Scarlett 18i8 USB Audio Interface
This mixer has 8 channels that allows 4 XLR mics, one USB-C port, and dual headphone outputs with independent volume controls. You can monitor all input levels in real time with the Direct Monitor circuit to reduce clipping. Best of all, it’s equipped with Focusrite’s switchable Air mode that gives every voice a brighter sound.
Read our full review of the Focusrite Scarlett.
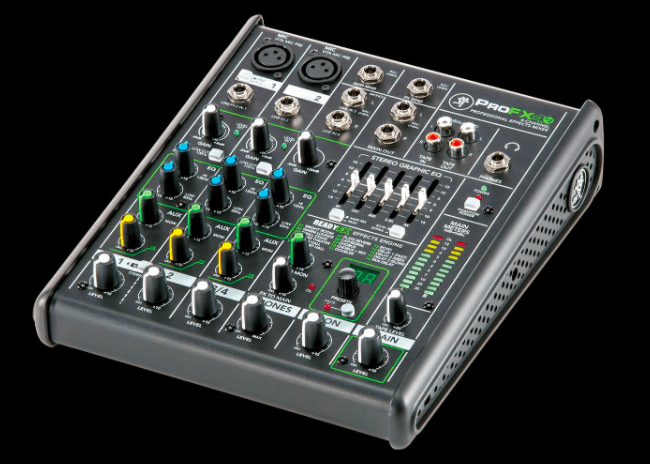
Mackie ProFXv2 Series
Choose from 4-30 channels, Mackie produces a range of high-end mixers. For most podcasters, the FX4 or FX8 should do the trick. They allow for 4 or 8 channels, 2 or 4 microphone inputs, and two AUX sends. Both include Ready FX that adds 16 ready-made sound effects like reverbs, delays, and choruses. The FX 8 has additional features like a USB interface and 3-band EQ on all channels making it better suited for live recordings.
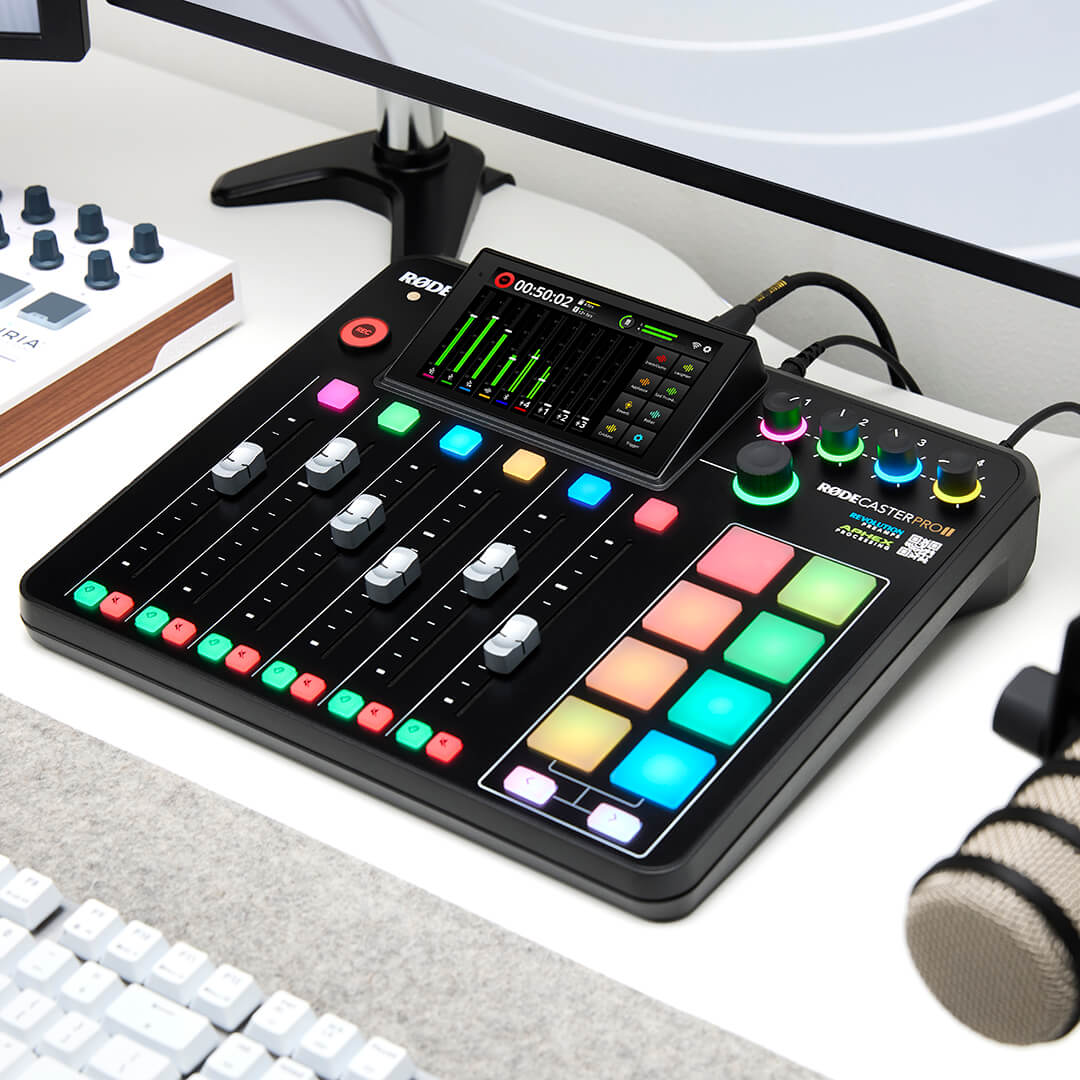
Rødecaster Pro 2
The RØDECaster Pro II is a true upgrade to its predecessor. It offers all of the powerful advanced features of the original RODECaster as well as some new ones, all in a smaller package, including bluetooth connectivity, 8 customizable pads, 2 USB-C interfaces, onboard APHEX DSP, 5.5 inch high definition display, and improved preamps.
Read more in our full review of the RODECaster Pro 2
Microphone stand
A mic stand or boom mount is a great solution for getting the mic up off the desk, and closer to mouth level. This is an important consideration because the vertical alignment (above or below) the mouth impacts the sound of your voice.
Using a stand also reduces the chances of knocking into the mic or having it rub against something while recording. Similar to the pop filters, most options are comparable and will get the job done.
Here are a few of our favorite microphone stands to improve your podcast setup. Check our full list of the best mic stands for podcasting.
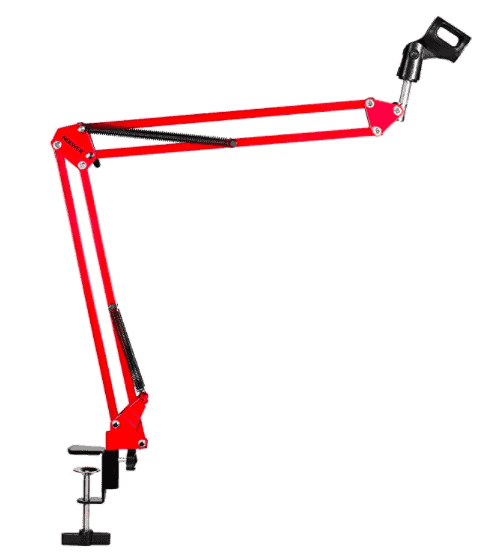
Neewer Boom Mount
This super adjustable boom mount is made of steel and can be attached to any table.
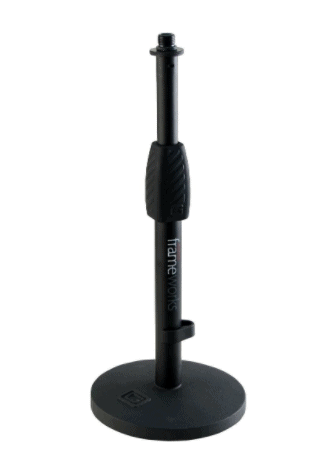
Gator Frameworks Weighted Base Microphone Stand
With a weighted base for stability, this stand has a max height of 23 inches. It has two adjustable points and is compact enough to fit into most podcast setups.
Part III. The Pro Stuff
Acoustic treatments
Recording in a space purposefully set up to capture crisper audio is a lifesaver during post-production. That means creating a DIY studio that eliminates the ” sound of the room” and reduces reverberations.
A few types of acoustic treatments are likely already around your house. Heavy comforters, full bookcases, rugs, or a closet are all adequate ways to remove ambient noise.
For beginners, we suggest starting with a DIY option. Find a closet with a few clothes hanging up then shut the door and record. Or go to a quiet room, toss a heavy blanket over yourself, then get going.
If you have a spare space to build a dedicated studio then acoustic panels are a worthy investment. Use Auralex’s Room Layout Express tool to figure out where to place the pieces.
Once you decide on the right room for your podcast setup, try these treatment options to get the most out of your equipment:
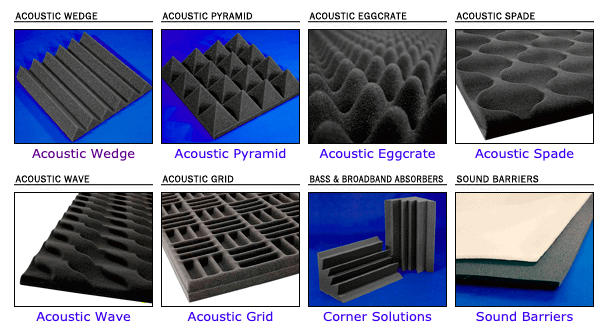
The Foam Factory
In a variety of shapes and sizes, The Foam Factory has affordable options to treat an entire room.
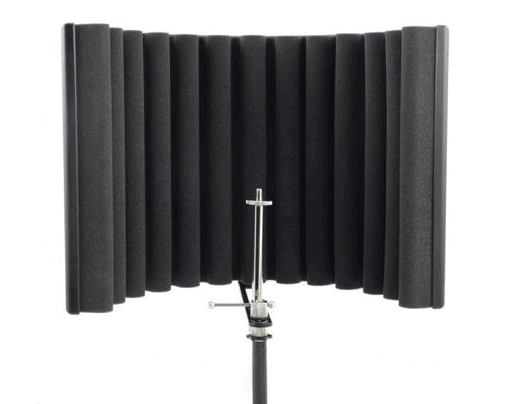
sE Electronics Portable Vocal Booth
Perfect for rooms already full of sound absorbing furniture (think carpet, bookcases, or a couch) or podcasters on-the-go. The piece attaches directly to the microphone stand for ultra-easy installation.
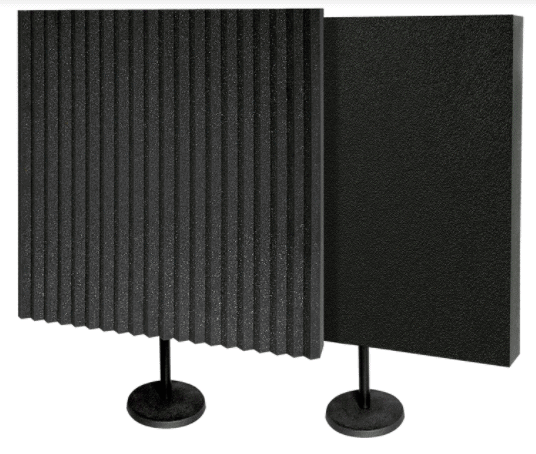
Auralex DeskMAX Kit
Auralex is the Rolls Royce of acoustic treatments so their equipment is on the pricier side. These panels are portable and fit neatly behind multiple microphones.
Video camera
If you want to take your podcast to the next level, it’s smart to capture video as well. This type of content makes great YouTube videos and social media posts. You’re already doing the work of creating the content, you might as well squeeze every ounce of value out of it.
Video podcasts tend to use their cameras in one of two ways: They either set the camera in one stop and capture the entire podcast from that angle, or set up multiple cameras in the same room. A single camera makes editing easy – there is no. Multiple cameras require you to splice different angles into the video file, but the end product is highly engaging.
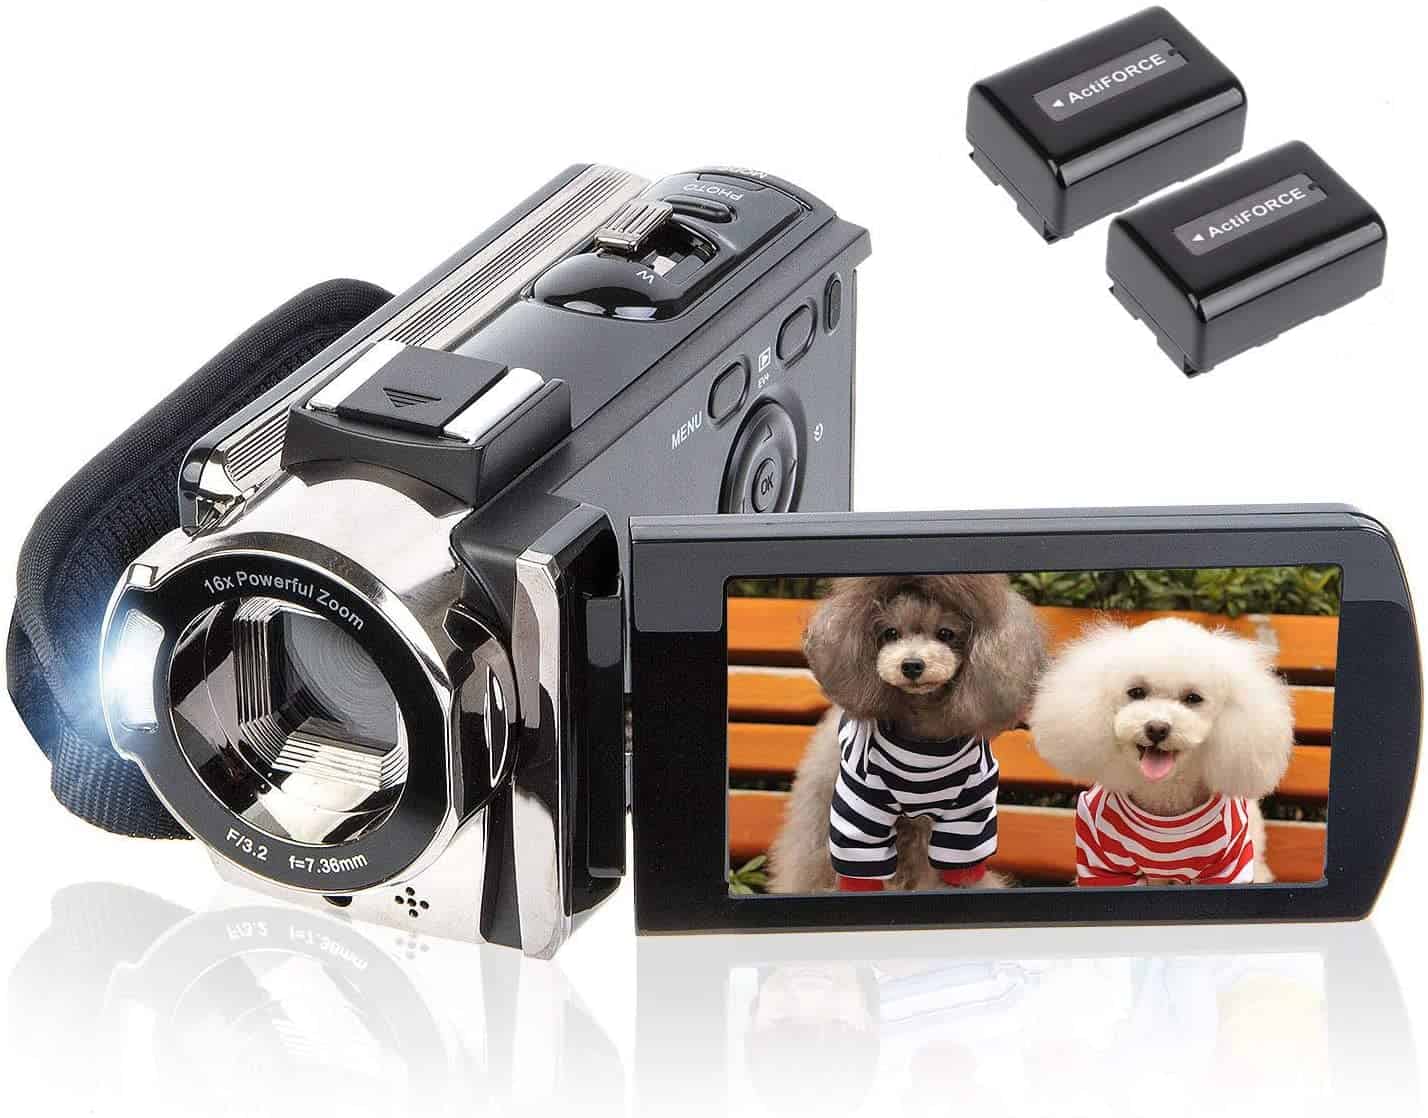
Kickteck HD Video Camera Camcorder
This is an easy and inexpensive option for capturing video and stills. It offers surprising quality for such a low price. It doesn’t plug into your computer, so you’ll need an SD card.
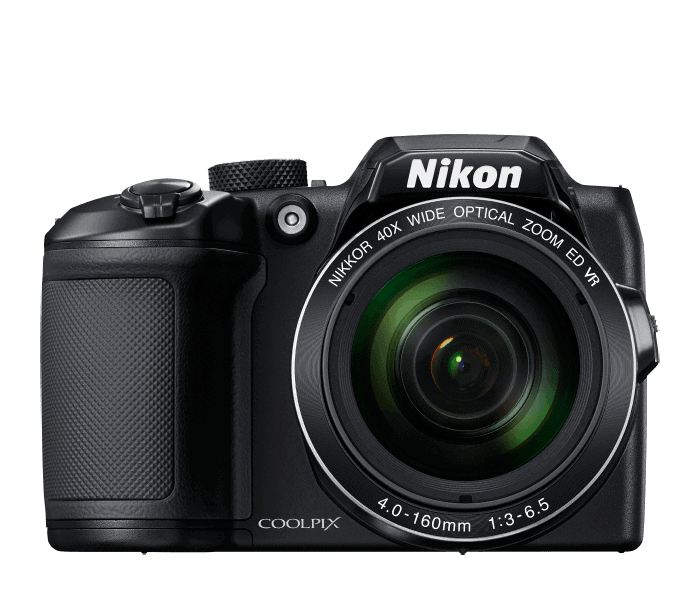
Nikon COOLPIX B500
This Nikon is a powerful mid-level camera that offers full HD recording and fun, creative effects. The large LCD display makes it easy to compose your shots.
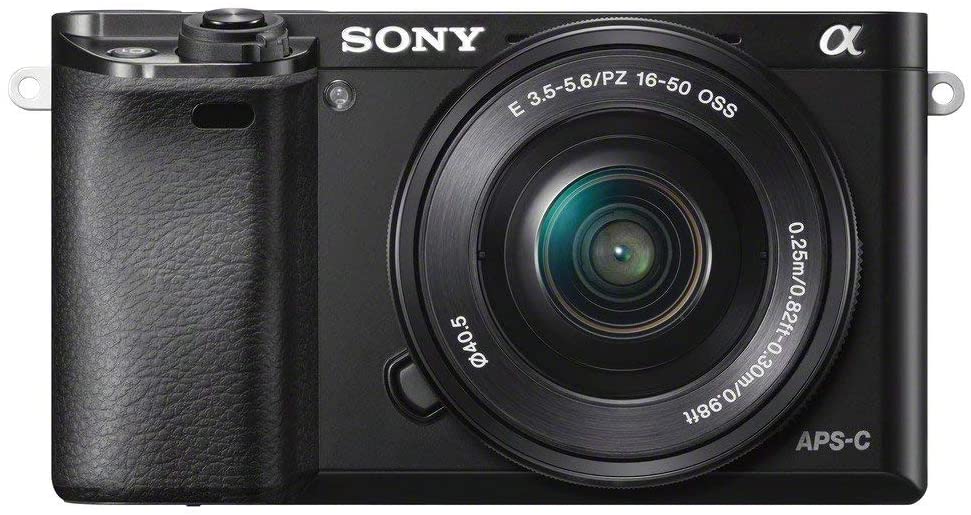
Sony Alpha a6000 Mirrorless Digital Camera
The Alpha a6000 takes unbelieve photos and video. The output is nothing short of cinematic. You can plug it directly into your computer via HDMI to transfer clean, uncompressed files.
Podcast Equipment Packages by Use Case
If you aren’t sure which of the gear we listed above is right for you, let’s talk about your needs. Here we offer some suggestions based on your needs.
The hobbyist
For podcasters that are starting their first show who have small budgets and need easy-to-use products.
-
Sennheiser GAME ONE Headset – $125
The power user
For podcasters that want to create professional sounding podcasts, perhaps in a small studio or with multiple people in the same room.
The streamer / in-house team
For serious podcasters who want perfect audio and have some money to spend.
-
Rode PodMic Cardioid Dynamic Podcasting Microphone – $99 (for in-the-field recording)
-
RØDE Procaster – $224
Accessories
A few extra items you need to put it all together.
-
Amazon Basics Mic Stand – $22
-
Heil Sound PL-2T Boom Arm – $129
-
Elgato Wave Mic Arm – $127
-
2x 6-foot XLR Cables – $16
3 Podcast Setups For Multiple Budgets
Each podcaster starts a show with a varying degree of money set aside to invest in new equipment and software. Nerves can set in looking at the amount of tools needed for the best podcast setup but you don’t need to spend an arm and a leg.
Based on our recommendations above, we put together podcast starter kits based on 3 different budgets. Each piece has a brief explanation around why it’s necessary for your setup and assumes you already have a computer in your arsenal.
From spending $20 to $500, here are our suggestions on the best podcast equipment packages.
Podcast setup for $20
For a $20 podcast setup, we’re suggesting the most DIY versions of our recommendations and saving your budget for a podcast hosting provider. You may not sound exactly like This American Life but you’ll get started quickly at a low investment.
-
Headphones with built-in microphone: at a $20 investment, there isn’t a podcasting microphone out there to fit the bill. Instead, use your standard earbuds that have a microphone built in. Try the Apple headphones that come with every iPhone, they’ll do the trick at this level.
-
A closet: for the best DIY acoustic treatment, grab your laptop and head to a closet, hang a few clothes up, and shut the door. This is a podcast setup used by the pros in a pinch and couldn’t be more budget friendly.
-
Audacity: the best free choice to record and edit a podcast is Audacity. Invest some time watching their many tutorials to feel confident going into your first recording.
-
Podcast hosting provider: Castos’ Essential plan begins at $19/month. It offers all the essential features every podcaster needs to produce a successful show.
Podcast starter kit for $250
Spending $250 on software and podcast equipment will help you achieve an advanced setup and polished sound. At this budget, there’s a combination of DIY and new podcast equipment for the optimal setup.
-
Audio Technica ART2100: a great dynamic mic for around $100 and no mixer needed when you use the USB hookup.
-
On-Stage Windscreen: at under $5, this windscreen will help reduce plosive sounds for less cleanup in post-production.
-
Sony MDR 7506 headphones: at this level of investment, we recommend quality over-the-ear headphones for a better recording experience. For around $100, the set is a piece of equipment you’ll hold on to for a while.
-
A closet: with a podcasting microphone, windscreen, and set of headphones, a full closet is the last piece to capturing crisp sound.
-
Audacity: to focus your money on equipment, Audacity is the best free choice to record and edit a podcast on a budget.
-
Podcast hosting provider: with $50 left to spare, consider upgrading to Castos Growth plan. With both, you’ll unlock private podcasting features. Using Castos, you’ll also have access our Headliner integration for custom audiograms to promote your podcast with style.
Podcast starter kit for $500
Committing $500 to create the ultimate podcast setup is the sweet spot. You’ll start with quality equipment and work with tools with a few more bells and whistles. We’ve found podcasters with some past experience in the industry get the most out of this setup.
-
MXL 990 XLR Condenser: It comes with a shock mount and mic stand adaptor so you can spend a little more on the mic.
-
Yamaha MG10 or MG06: with an XLR mic, you’ll need a mixer. Yamaha’s MG series offer a great sound at an affordable price.
-
PEMOTech Pop Filter: with a condenser mic, you’ll also want a pop filter. PEMOTech’s option fits with almost every standard mic.
-
Sennheiser HD280 Pro headphones: this set is perfect for a lifetime investment with the ability to affordably replace the pads and cords later on.
-
sE Electronics Portable Vocal Booth: to achieve high quality sounding audio, give this vocal booth a try in room organized for better acoustics (added rugs, couches, or bookcases).
-
Hindenburg Journalist: with more podcasting experience comes more advanced DAWs. Hindenburg was built for spoken audio and will help you get the most out of your mic and mixer.
-
Podcast hosting provider: to make your investment worth it, use a podcast hosting provider with additional promotion and storage features. On Castos’ Pro plan, you’ll unlock our most advanced analytics and have the ability to host video files. Promote episodes with custom audiograms and republish them to YouTube help new people discover your show.
Podcast starter kit for $5,000
If you’re willing to invest some cash on your podcasting adventure (perhaps you’re starting a branded podcast or internal podcast), it’s possible to pick up some truly professional gear for about $5,000. With these items, you’ll produce radio-quality audio.
-
Electrovoice RE20 Announce Mic: This is a professional quality dynamic cardioid microphone with studio condenser-like performance is great for on-site recording.
-
Samson Go Mic Portable Microphone: If you record on an alternate location, you’ll need something portable that still sounds professional. This field mic is compact and plugs in via USB to your computer.
-
Sennheiser HD 650 Audiophile Hi-Res Open Back Dynamic Headphones – These headphones were crafted for the listeners with high expectations. It offers a balanced frequency response, making it exceptionally accurate.
-
RØDECaster Pro Podcast Production Studio – This is a powerful all-in-one solution for podcasting. It offers superb audio features while still being easy to use. It offers four mic inputs with studio-grade preamps for recording crystal-clear audio. It also offers smartphone, USB, and Bluetooth channels for seamlessly integrating remote guests, eight sound pads for triggering music and sound effects, powerful audio processing and so more.Pro Tools – If you have the budget, it’s best to go with the best DAW available. Pro Tools includes every feature you could possibly need to host a great podcast.
-
RØDE PSA1 Professional Studio Arm: This is a quality, professional studio boom arm for easy and precise placement of any microphone. It’s durable and offers noise-free operation.
-
XLR cables – It’s important to have multiple sets of XLR cables on hand so you never go without, especially if you’re using XLR microphones. We recommend having at least four, no shorter than six feet.
-
PEMOTech Pop Filter: with a condenser mic, you’ll also want a pop filter. PEMOTech’s option fits with almost every standard mic.
-
Primacoustic London Acoustic Panels: When it comes to acoustic panels, you can’t have too many. These will eliminate echos and make your studio look attractive on video.
-
Sony Alpha a600 Mirrorless Digital Camera: The Alpha a6000’s output is downright cinematic. You can plug it directly into your computer via HDMI to transfer clean, uncompressed files.
-
SD cards: It’s always a good idea to have a bunch of SD cards on hand to capture audio and video. You do not want to find yourself in a middle of a recording without anywhere to save the data. Your team and your guests won’t appreciate it.
-
Podcast studio: If you have the budget, we recommend building out a quality podcast studio. Use a small room without widows (or cover the windows). The walls should be soundproof (so no outside sound gets in) and lined with fabric. Avoid any hard surface that isn’t necessary.
Podcast Equipment Summary
Purchasing podcast equipment for the perfect setup is the first big hurdle aspiring podcasters face. Some people may opt to spend more on a microphone while others want a premium DAW in post-production.
Luckily there’s no right answer. Your podcast starter kit should be custom to your preferences and what you’re looking to gain from podcasting.
No matter your budget, from $20-500, there’s the right podcast equipment out there for you. Now use this list to start placing a few orders.
Questions to Ask Yourself Before Purchasing Podcast Equipment
Before you start browsing Amazon, it’s important to ask yourself a few questions. These questions will go a long way toward narrowing down your search for podcast equipment.
How serious am I about podcasting?
Before you start buying equipment, it’s important to evaluate your own intentions. What are your goals for podcasting? Do you see this as a temporary hobby? Or do you intend to treat your podcast like a serious business?
If you’re just messing around with some friends, it makes sense to limit your spending on podcast equipment, especially in the beginning. You probably want to pick up some inexpensive products in case you decide to abandon the project in a short time.
However, if you are part of a team of people who are taking this very seriously, it may make sense to spend a few dollars on top quality equipment. For instance, a corporate podcast or a branded podcast should reasonably invest serious cash into their show.
What is my budget?
This is the second question you should ask yourself, but it’s arguably the most important. The amount of cash you have to spend on podcast equipment will likely determine the individual pieces you can buy. If your budget is small, you won’t have much to consider.
That said, keep in mind that small budgets are fine for podcasting. There are plenty of affordable products that sound great. Plenty of people start podcasting with just their laptop microphone.
How many people will be recorded?
The number of people who will be recorded on your show will affect the type and amount of podcast equipment you buy. If you are recording alone, you just need one mic. An interview show needs two mics, unless all of your interviews are recorded remotely. A panel show would need as many mics as the number of people you expect to participate.
Where will I record my podcast?
Recording in a private recording studio is much different than recording in restaurants or busy convention centers. So you’ll need different podcast equipment depending on your recording location.
For instance, if you intend to record while riding your bike, a traditional microphone doesn’t make sense. Instead, you’ll want a lavalier mic. If you intend to record in-person but at your interview’s location, traditional mics are fine, but you’ll want something less bulky.
Furthermore, the type of location will influence your acoustic treatment equipment. If you are recording in a quiet place with soft surfaces, you don’t need much to control reverb. But if your recording space has natural background noises, you may want to pick up some acoustic paneling or a reflection shield to keep your sound clean.
Can I manage all the tech?
You’ll want to consider your comfort level with technology as well. If you struggle plugging tech together, installing drivers, and configuring settings, it’s probably smart to stick to simple entry-level options. Opt for USB plug-and-play products wherever possible.
But if you feel comfortable hooking multiple devices together, learning new systems, and tweaking settings (especially in regards to audio tech), you should be fine with more advanced podcast equipment. Just make sure you understand what each device is supposed to do before you purchase it, otherwise you’ll over-buy.
Will I record video as well?
Some creators like to produce a video podcast. It’s just like a regular podcast, but you also capture video of the hosts. You can upload the video directly to YouTube as is, or you could edit in some other clips to make it more dynamic. This is an easy way to squeeze more content out of your work.
If you want video content as well, you’ll need a camera, some lighting equipment, and a recording space that looks decent on camera. You don’t need a complete podcast studio, but you just need a clean, non-distracting space. A simple movable room partition could be enough.
Launch Your Podcast In Minutes
Castos makes launching simple with one-click setup, automatic distribution to all platforms, and professional hosting. No technical skills required.
Start your 14-day free trial